Fundamentals of XCUITest

Modern iOS apps have to contend with a complex interplay of rendering responsive layouts for users to interact with, while handling concurrency for operations like consuming REST APIs or persisting data. It begs the question, as a developer how do you prevent app source code changes from unintentionally breaking user flows in your app?
One solution is to create and maintain automated user interface (UI) tests to programmatically validate that your app behaves as expected when user actions are performed. Fortunately, Apple's XCTest framework enables you to create UI tests to interact with your app akin to how a user would. In this guide we will cover the fundamentals of creating UI tests with XCTest.
Contents of this Guide
● Adding UI Tests to your Xcode Project
- Adding to a New Project
- Adding to an Existing Project
● The UI Test Class
- Setup
- XCUIApplication
- XCUIDevice
- Teardown
- Test Methods
● Interacting with UI Elements
- Getting Elements in the View
- Predicate String
- Accessibility Identifier
- Storyboards
- Swift UI
- React Native
- Element Properties
- Element Actions
● Assertions
● Executing Tests
- From the Test Navigator in Xcode
- Creating a new Test Scheme in Xcode
- Using the
xcodebuildCLI
● Blackbox Testing
Adding UI Tests to your Xcode Project
When you add UI tests to an Xcode project they are given their own group and build target. This is because UI tests are compiled and deployed onto a separate app called the XCUIApplication test runner. The UI test code you write executes within the test runner app and not your target app. The test runner app acts like a proxy, it takes the the test logic you've written and translates it to iOS Accessibility actions that it performs against your target app. This is done to emulate using your app in the same way a human would. From a developer perspective, this means we do not directly interact with the UIKit elements in our app, like UILabel or UIButton, but rather through proxy elements called XCUIElement.
Adding to a New Project
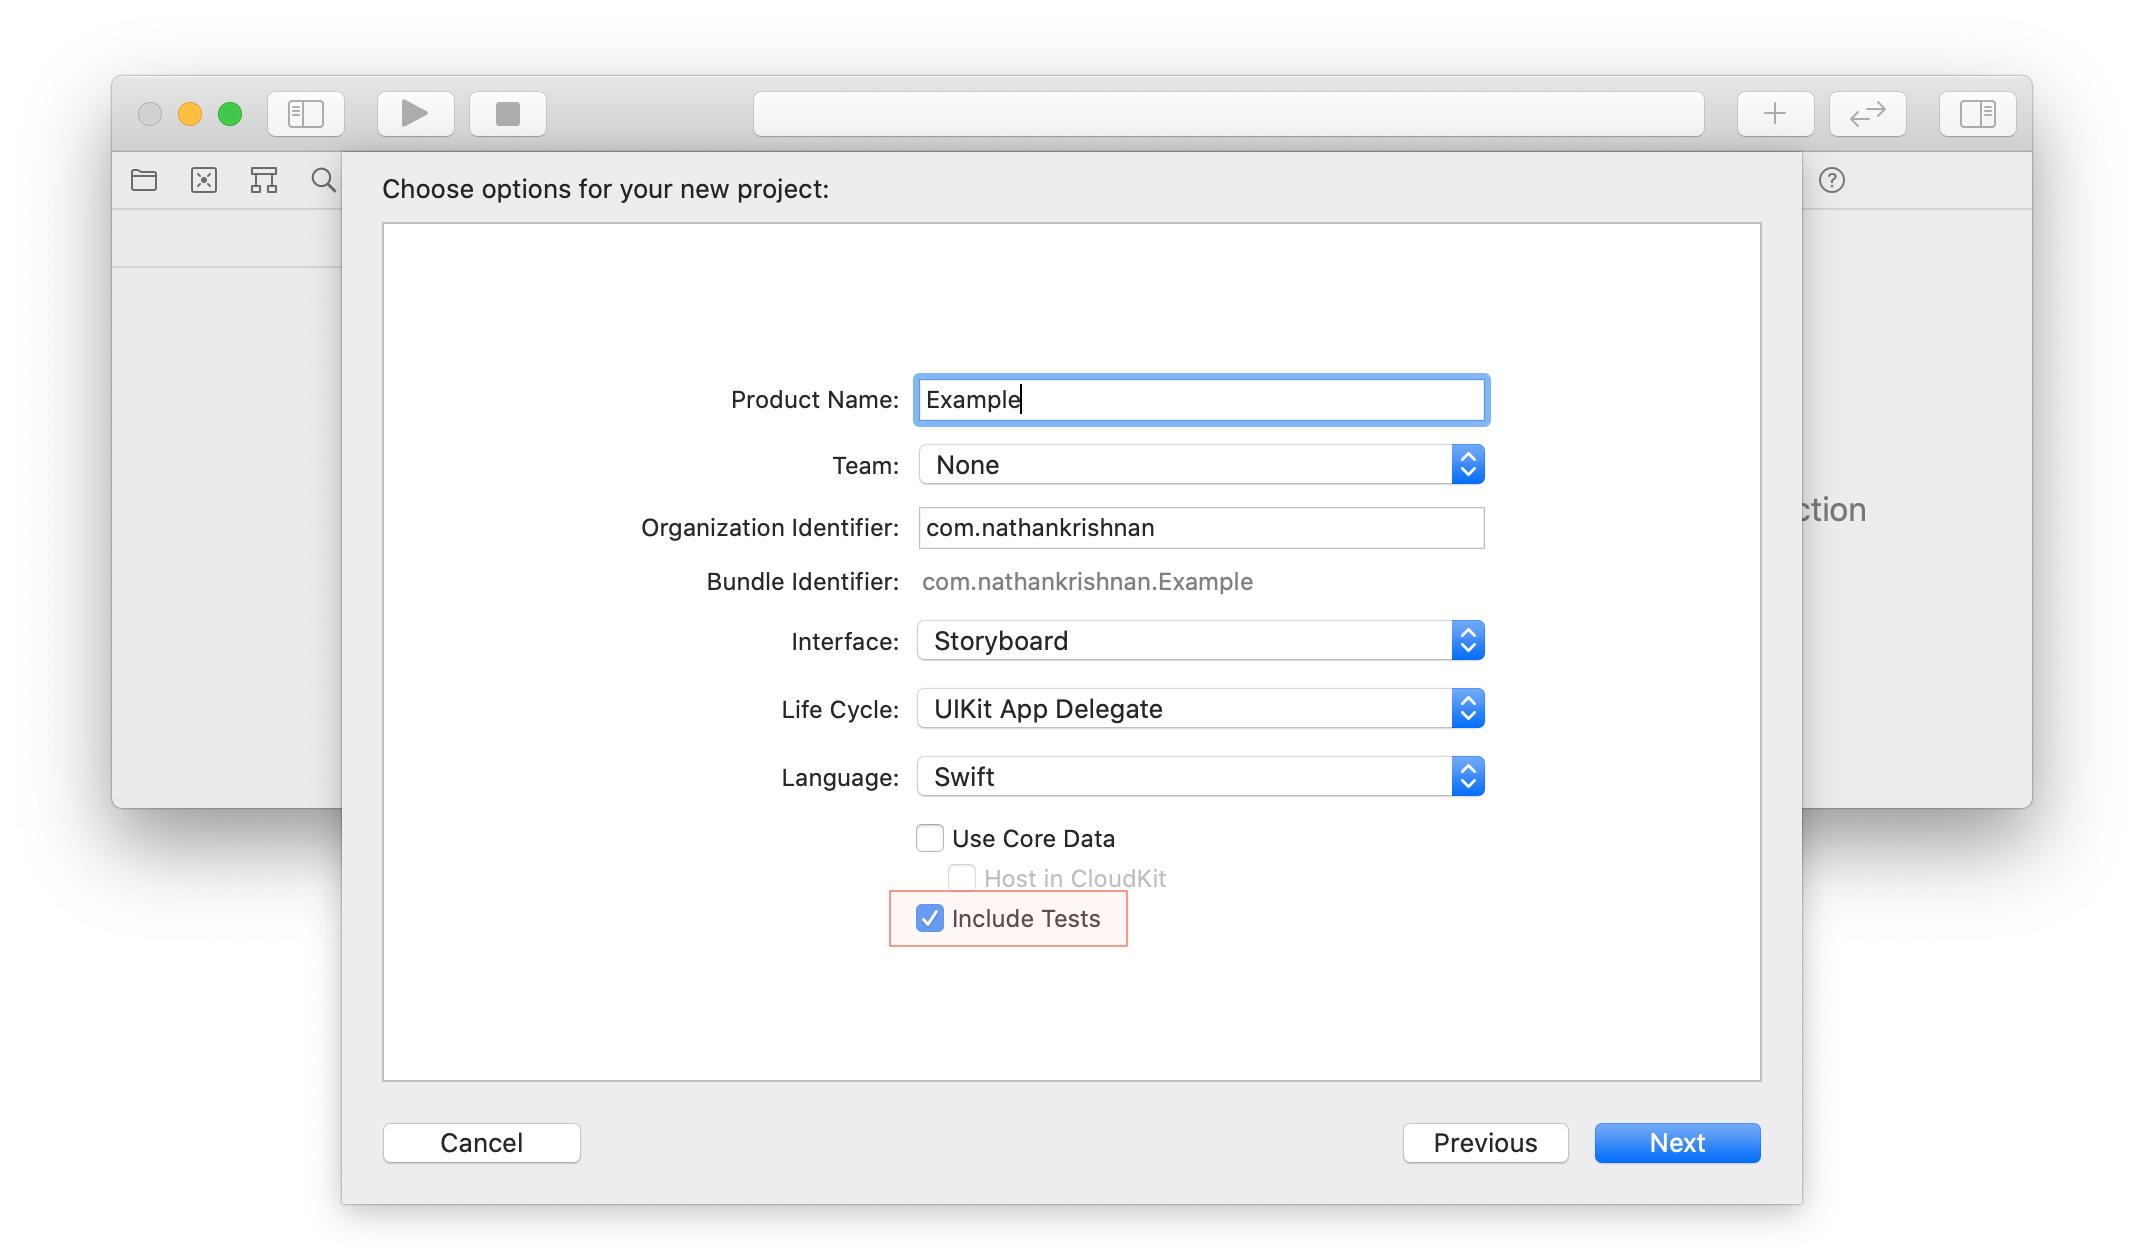
When you create a new project in Xcode, select the "Include Tests" checkbox option.
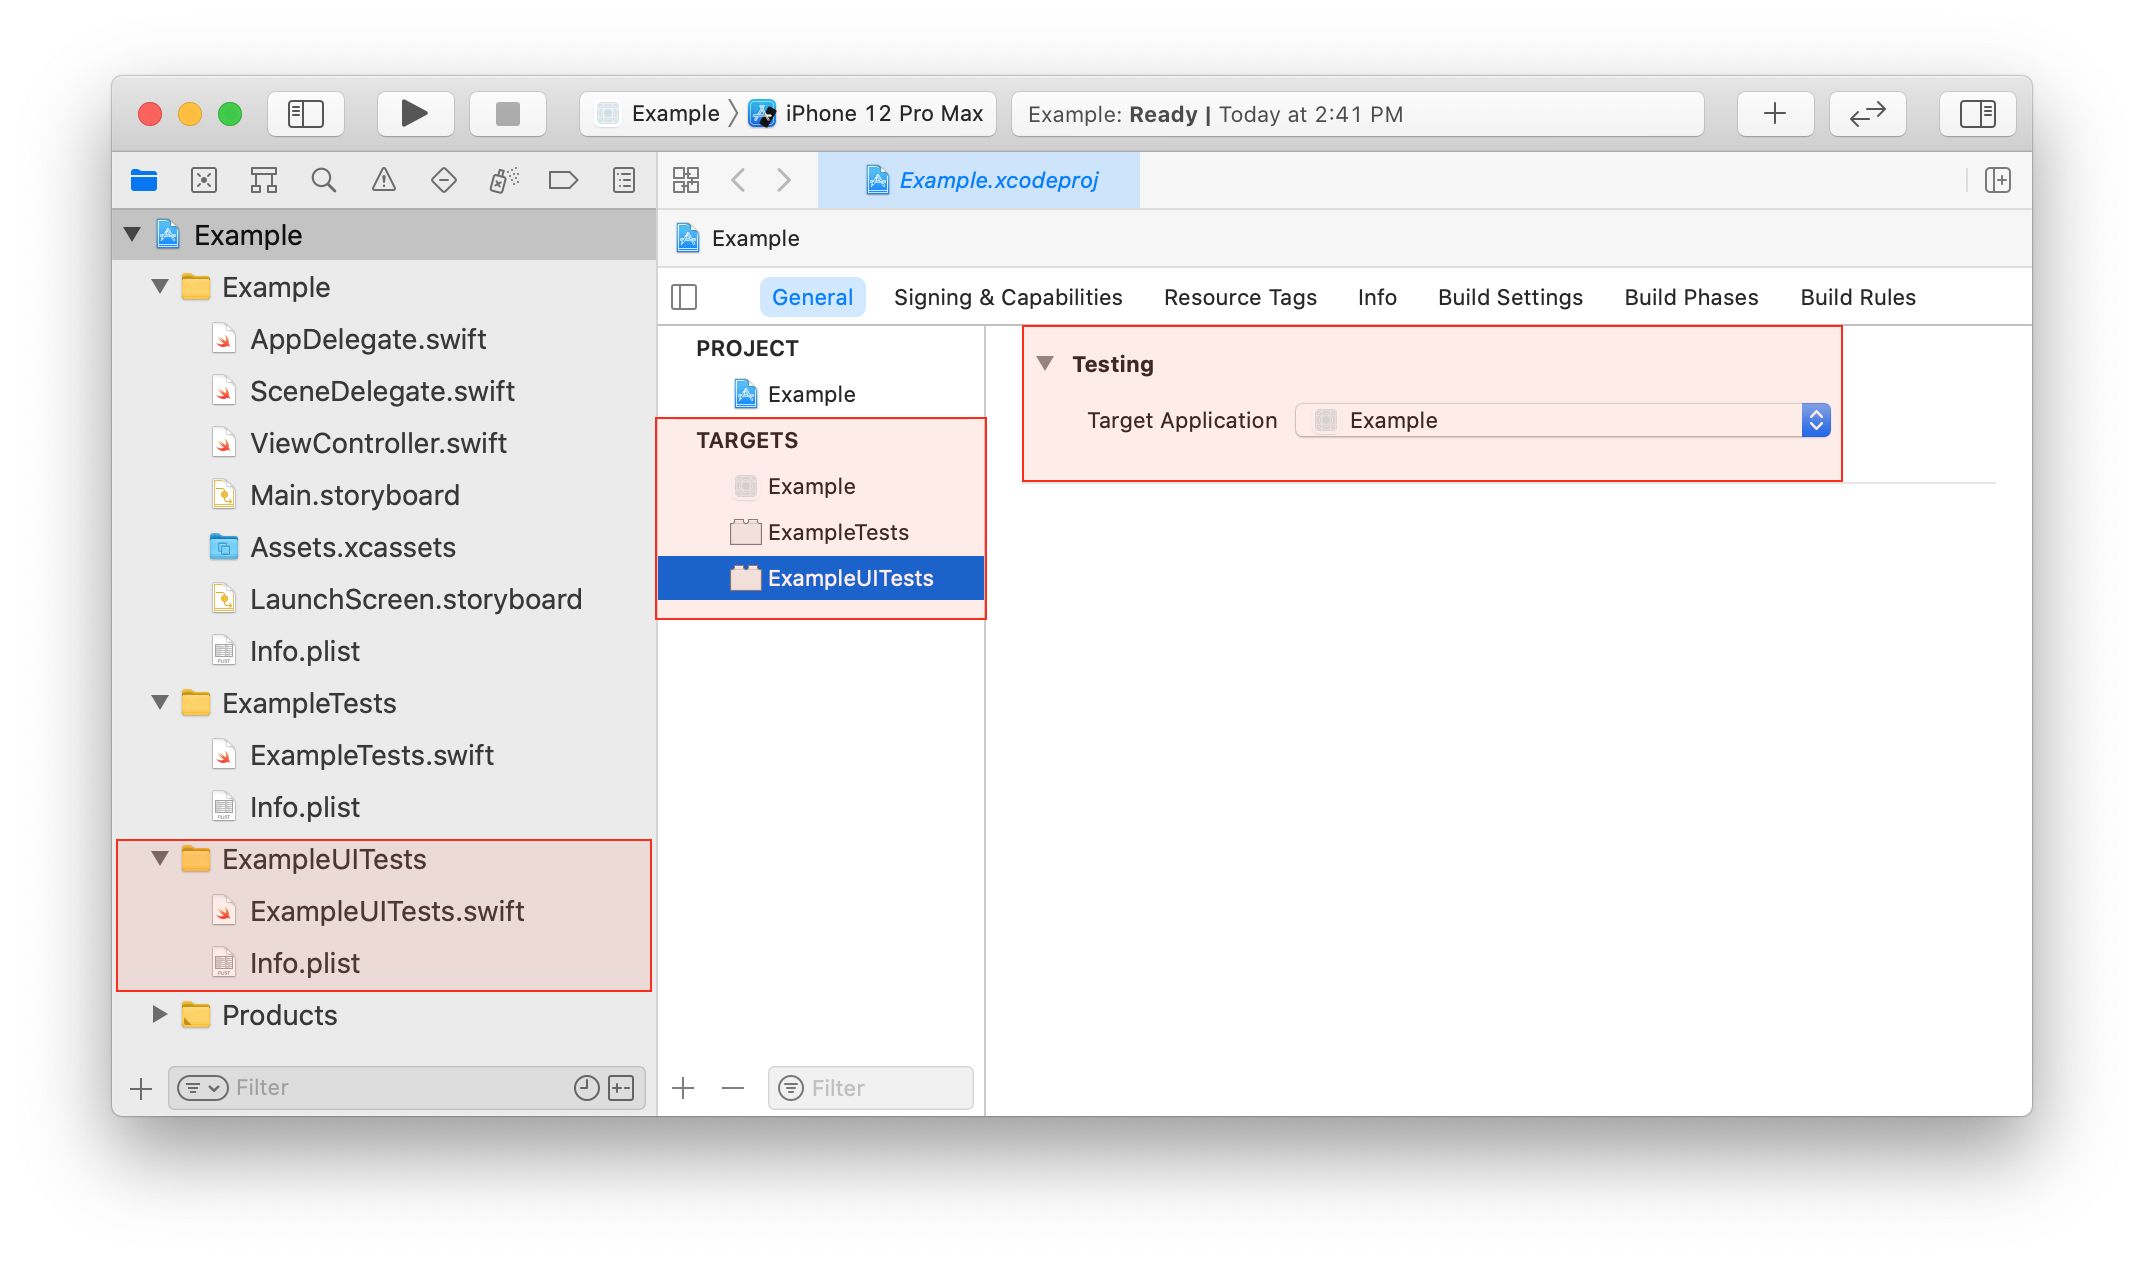
When your project is created, you will see in the Project Navigator section:
- A UITests group that has been scaffolded for containing your UI test files.
- A new project build target, where the target application is your main app.
Adding to an Existing Project
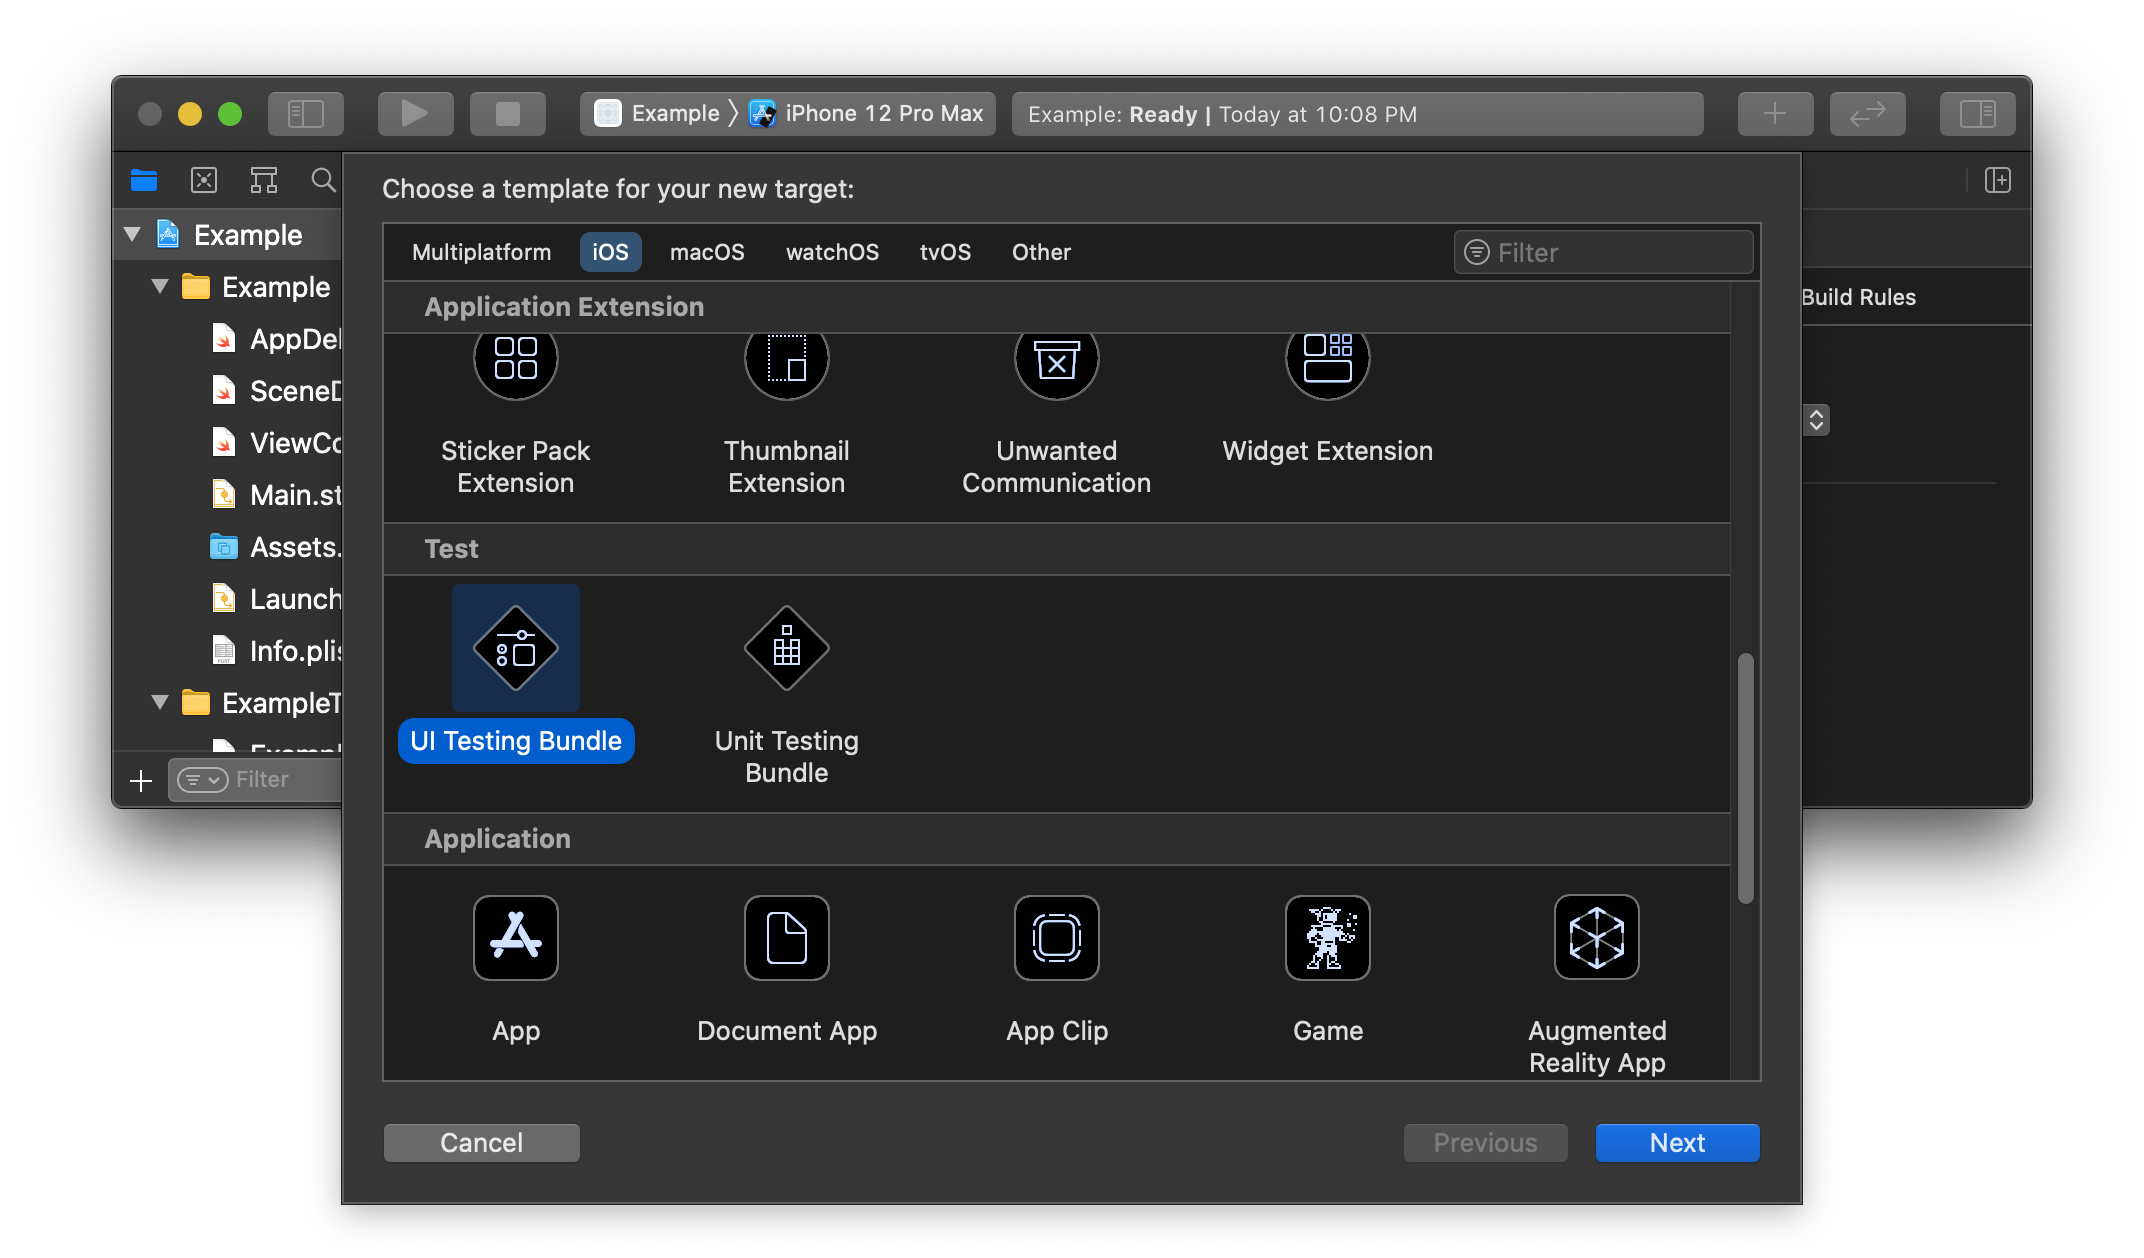
If you have an existing Xcode project and want to add UI tests, select File > New > Target... from the Xcode menu bar. From the target template dialog box, scroll to the Test section and select “UI Testing Bundle”.
After you press Next, you can either provide a name for your tests group or use the defaults that Xcode generates.
The UI Test Class
A UI test class is a Swift class that inherits from XCTestCase. We'll walkthrough the core structure of what a test class contains.
Setup
A test class can only contain one setup method. The method declaration looks like this:
override func setUpWithError() throws
Before each test executes, XCTest calls setUpWithError() and we can perform our preparation tasks here. We override the method since it comes from the super class XCTestCase.
Note: If you're wondering what the throws keyword does in this context, it allows the method to propagate errors that occurred during execution to the XCTest framework caller.
XCUIApplication
Recall that the UI test code you write executes from a test runner app and not your main app. XCUIApplication is a proxy object that represents your target app. You will typically declare an XCUIApplication variable in your test class, instantiate it in your setup method, and call its launch method. For example:
class ExampleUITests: XCTestCase {
    var app: XCUIApplication!

    override func setUpWithError() throws {
        try super.setUpWithError()

        app = XCUIApplication()
        app.launch()
    }
}
The launch method is synchronous and returns a proxy object that represents your target application.
Alternatively, you can initialize XCUIApplication to target a preinstalled app on your device by providing a Bundle Identifier string. For example, if you want to launch mobile Safari:
app = XCUIApplication(bundleIdentifier: "com.apple.mobilesafari")
XCUIDevice
You can control the device orientation, simulate pressing a physical button on a device, and simulate interfacing with Siri with the XCUIDevice proxy object. XCUIDevice is a singleton, which we can access with its shared property:
let device = XCUIDevice.shared
Setting or changing the device orientation is a commonly used property of this class. It has an orientation property that can be used to get or set the orientation of the device on which the UI tests are executing on. When setting an orientation value, you'll provide a UIDeviceOrientation enum value. Here are some of the main orientation values:
UIDeviceOrientation.portraitUIDeviceOrientation.landscapeLeftUIDeviceOrientation.landscapeRightUIDeviceOrientation.portraitUpsideDown
For example you could set the device orientation to portrait mode in the setup method to ensure that the device is in a consistent orientation when running UI tests:
class ExampleUITests: XCTestCase {
    var app: XCUIApplication!
    let device = XCUIDevice.shared

    override func setUpWithError() throws {
        try super.setUpWithError()

        app = XCUIApplication(bundleIdentifier: "com.apple.mobilesafari")
        app.launch()

        device.orientation = UIDeviceOrientation.portrait
    }
Teardown
Likewise, a test class can only contain one teardown method. The teardown method declaration looks like:
override func tearDownWithError() throws
In the teardown method we can perform any cleanup tasks or throw errors when the test case ends. We also override this method since it comes from the super class XCTestCase. A common teardown task is quitting the app under test. For example:
override func tearDownWithError() throws {
        try super.tearDownWithError()

        app.terminate()
}
Test Methods
In a UI test class we can create new test cases by creating new methods, where each method represents an individual UI test. The naming convention for test methods is to prefix them with the word test. For example:
func testTapOnRefreshButton() throws {
	// Test logic here...
}
To create our test case logic, we'll need to know interface with the elements in the app under test. In the next section we'll explore how to do this.
Interacting with UI elements
We have discussed how XCUIApplication is a proxy object that represents your target app. The XCUIApplication class inherits from the XCUIElement class, which conforms to a protocol called XCUIElementTypeQueryProvider. The significance of this from a developer perspective is that with an instance of XCUIApplication we can query for, and access, the visible elements in any given view of the app under test.
We'll first walkthrough the different properties XCUIElementTypeQueryProvider offers for identifying elements. We'll then discuss some of the common methods and properties of an XCUIElement.
Getting Elements in the View
XCUIElementTypeQueryProvider is a protocol that XCUIApplication conforms with that provides properties for identifying elements. Each of its properties will return an XCUIElementQuery object that we can use to locate an element. I'll highlight some of the commonly used properties:
var alerts: XCUIElementQuery
Returns a query that provides access to any alert if visible in the view.
var buttons: XCUIElementQuery
Returns a query that provides access to all visible buttons (UIButton) in the view.
var staticTexts: XCUIElementQuery
Returns a query that provides access to all visible text labels (UILabel) in the view.
var textFields: XCUIElementQuery
Returns a query that provides access to all visible text input fields (UITextField) in the view.
var tables: XCUIElementQuery
Returns a query that provides access to all visible table views (UITableView).
var otherElements: XCUIElementQuery
The name is somewhat of a misnomer, but this property is very helpful to be aware of. It returns a query that provides access to other subviews (UIView) in the current view. Sometimes designers will utilize a UIView to serve as a custom styled button. Using UIViews to create custom styled buttons is also common for iOS apps built with React Native.
Note that each of these properties returns an XCUIElementQuery for all of the given element type we are looking for. We can provide specific qualifiers to these queries to identify an individual element. One way is to subscript for the exact text we're looking for. For example:
let companyNameTextElement = app.staticTexts["Tesla, Inc."]
If the string "Tesla, Inc." appears in the view, then companyNameTextElement will contain an XCUIElement result. We'll soon cover what properties and method actions you can perform on an XCUIElement. However this approach is not very flexible, what if the company name text appears in a slightly different format? There are two other approaches we can use to qualify our query: providing a predicate string or an accessibility identifier. Although different techniques, both of these approaches allow us to construct a XCUIElementQuery. I'll first highlight some of the common properties and methods XCUIElementQuery provides.
var count: Int
Evaluates the query and returns the number of elements that match.
var element: XCUIElement
Get the first matching element in a query.
func element(matching: XCUIElement.ElementType, identifier: String?) -> XCUIElement
Return an element that matches the provided element type and accessibility identifier string.
Predicate String
A Predicate String is a logical condition you can express using a particular specification Apple provides. It's a deep topic and I recommend taking a look at this cheat sheet to get the practical gist. Here's an example of how we can use a predicate string to improve our previous query:
let predicate = NSPredicate(format: "label CONTAINS[c] 'tesla'")
let textQuery = app.staticTexts.containing(predicate)

// Check to see if the query contains results
if textQuery.count > 0 {
  let companyNameTextElement = textQuery.element
}
Using a predicate string, we made our query more flexible by performing a case insensitive check to see if the text contained 'tesla'.
Note: the [c] is for doing a case insensitive check
However, the Predicate String approach should be a last resort in my opinion. While it provides the ability to create expressive conditions, it also adds more logical complexity to a test case. This can impact how readable your UI automation code is. My preference is to use an accessibility identifier, when possible, for locating an element.
Accessibility Identifier
An accessibility identifier is a string you can add to a iOS UIKit element to uniquely locate it during a UI automation test. You can think of it like placing a bookmark in a book, it gives us the ability to do a direct lookup.
Storyboards
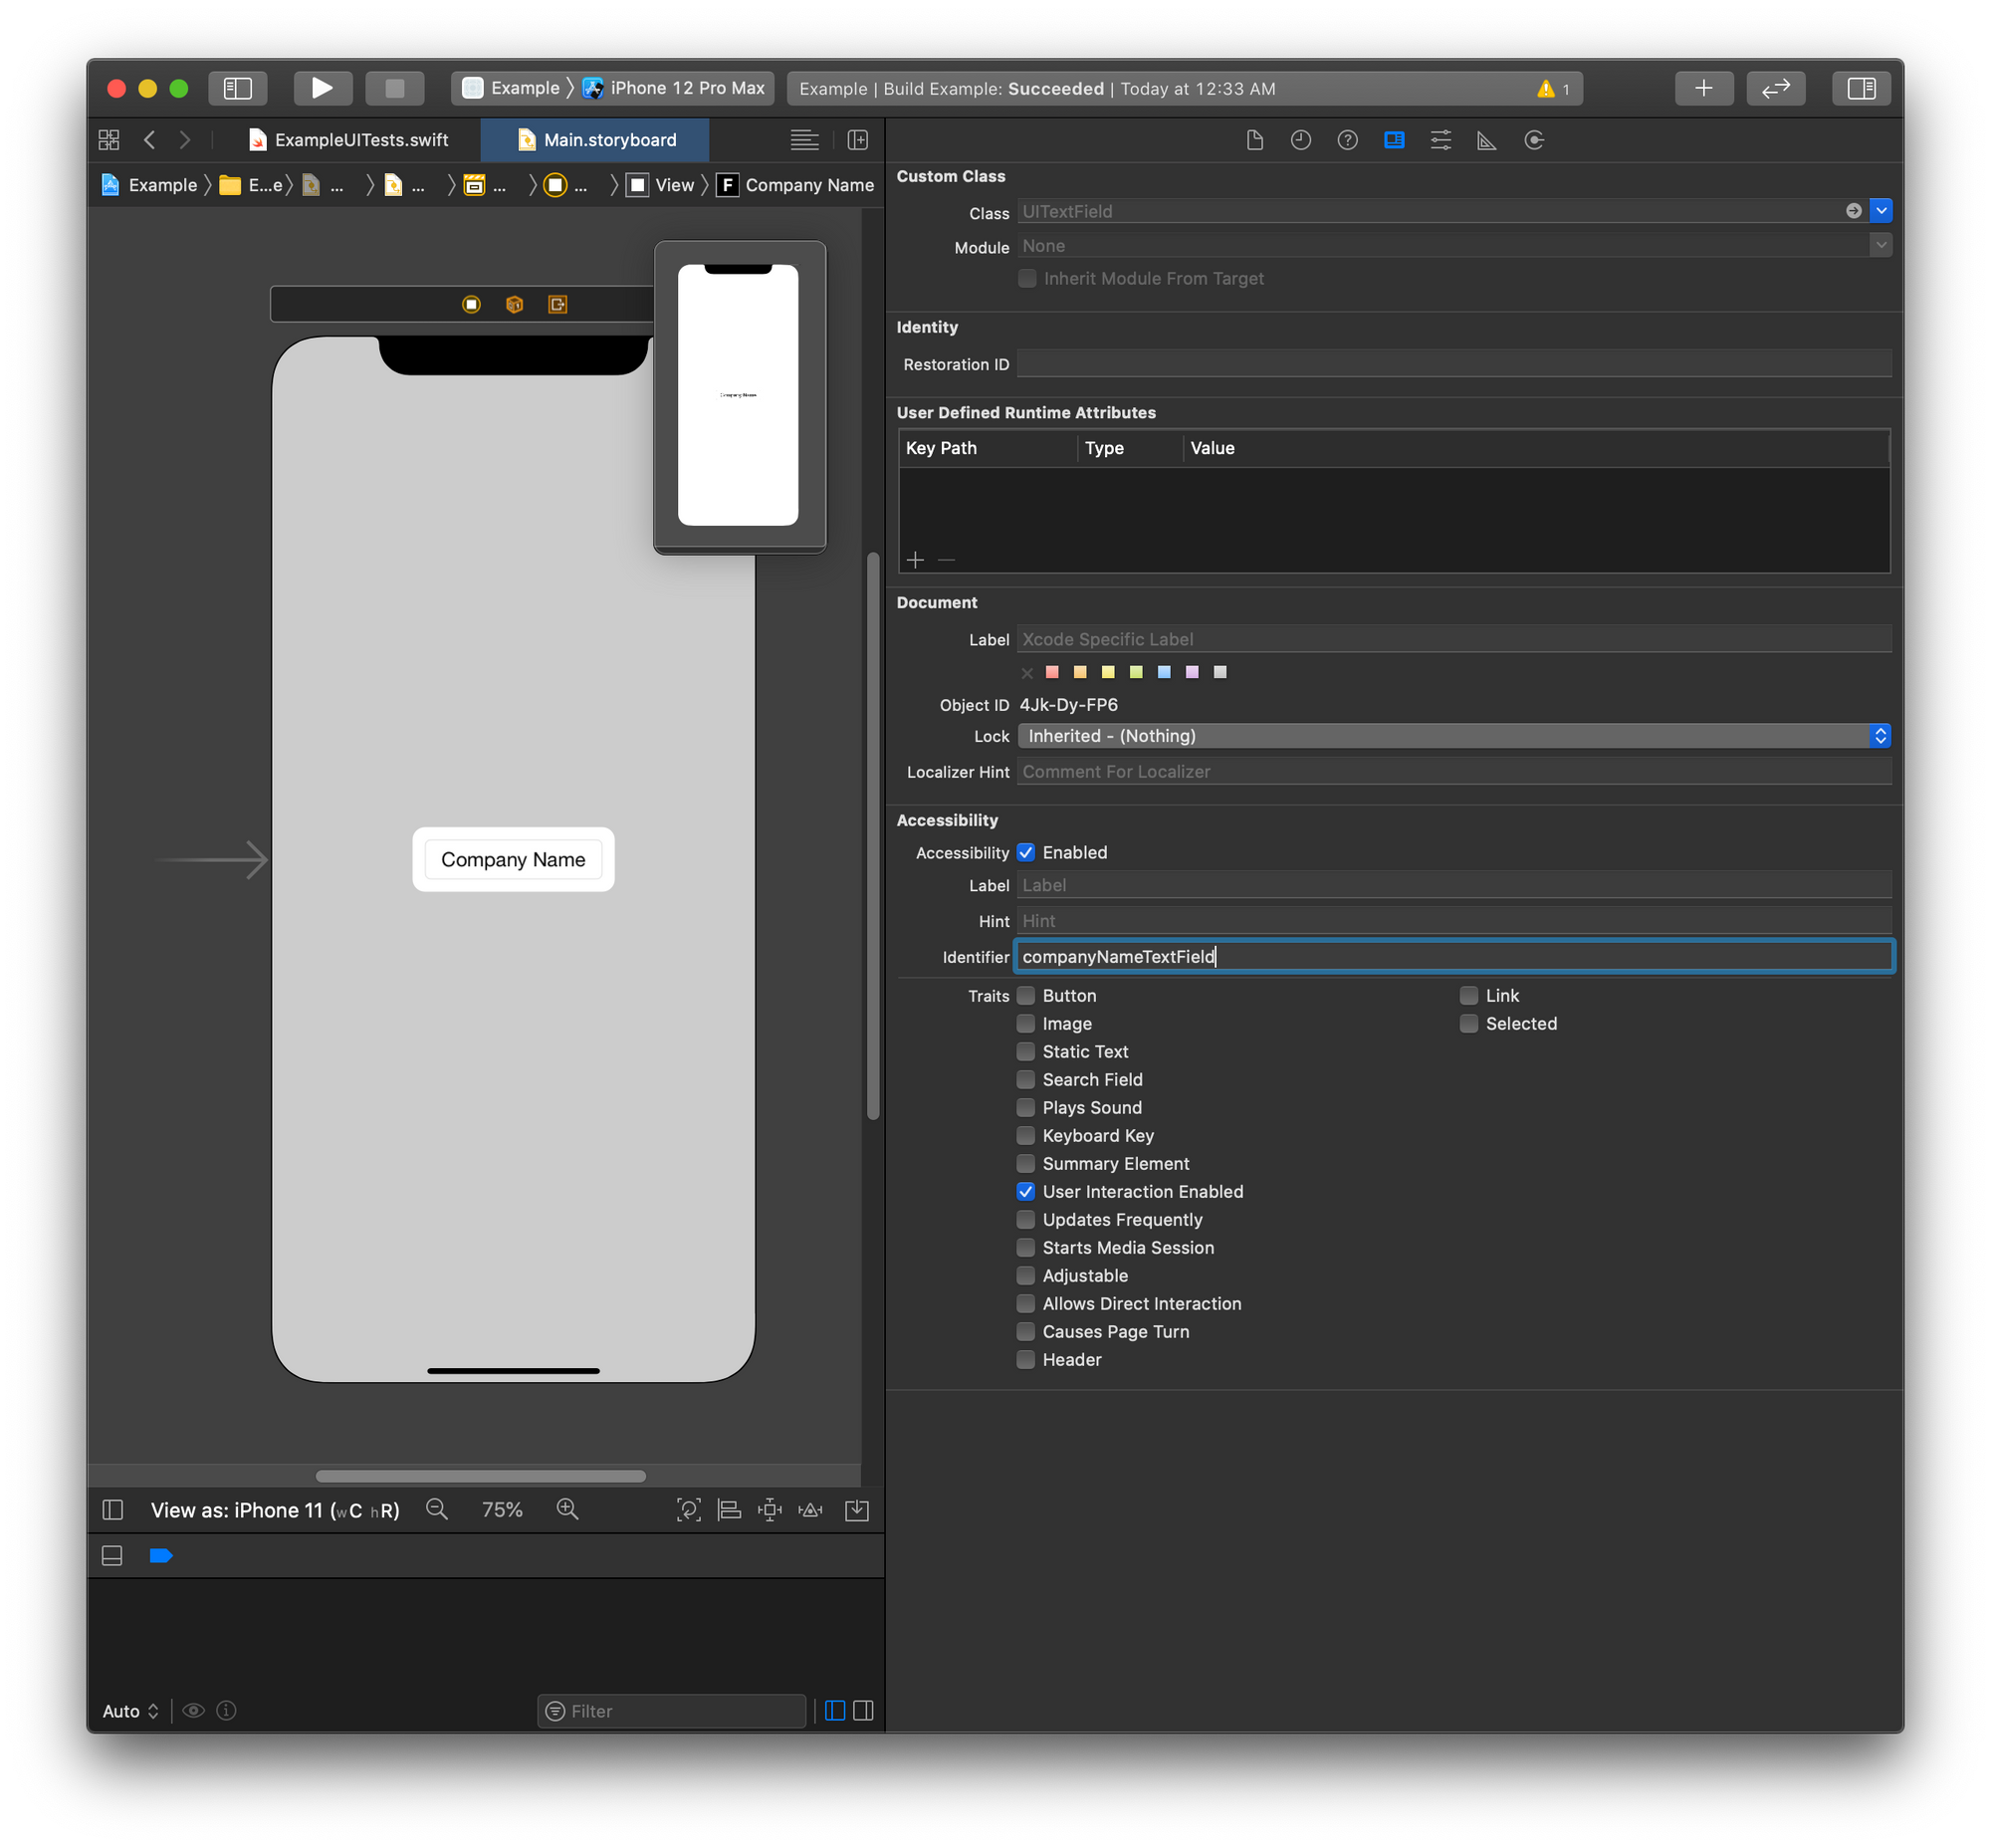
If your iOS project uses Storyboards, you can visually select the interface element in the Storyboard and from the Identity Inspector provide the string in the Accessibility Identifier section. For example:
Swift UI
If your iOS project uses SwiftUI for layout creation, you can add the accessibility identifier in code. For example:
Button(action: {}, label: { Text("Submit") }).accessibility(identifier: "stockTickerSymbolSubmitBtn")
React Native
If you've built your iOS app using React Native, you can also add accessibility identifiers in code as well. Please refer to my guide on this subject.
Here's an example of how we can identify an individual element by its accessibility identifier:
let companyNameTextElement = app.staticTexts.element(matching: XCUIElement.ElementType.staticText, identifier: "stockNameText")
In the element method we provide input to two parameters:
matching: The XCUIElement Typeidentifier: The accessibility identifier string
Element Properties
In the previous section, we explored different approaches to query for XCUIElements. Once you have an XCUIElement, there are different property values you can retrieve. I'll highlight some of the common ones below:
var exists: Bool
Determine if the element exists
var isHittable: Bool
Determine if the element can be tapped in its current location
var label: String
Returns the label attribute of the element
var placeholderValue: String?
Returns the value that is displayed when the element has no value
var value: Any?
Returns the raw value attribute of the element.
var isEnabled: Bool
Determine if the element can be interacted with touch actions
For example, if we wanted to get the string from an XCUIElement that represents a UILabel in the view:
let companyNameText = app.staticTexts.element(matching: XCUIElement.ElementType.staticText, identifier: "stockNameText")

print("Company name text: \(companyNameText.label)")
Element Actions
There are a variety of actions we can also perform on an XCUIElement. Here are some of the common methods used:
func tap()
Sends a tap event to the element.
func doubleTap()
Sends a double tap event to the element.
func press(forDuration: TimeInterval)
Sends a long-press gesture to the element for the duration you specify
func typeText(String)
Types a string into the element.
func swipeLeft()
Sends a swipe-left gesture.
func swipeRight()
Sends a swipe-right gesture.
func swipeUp()
Sends a swipe-up gesture.
func swipeDown()
Sends a swipe-down gesture.
For example, if we want to enter text into an XCUIElement that represents a UITextField and tap another XCUIElement that represents a UIView that functions as a custom button:
let textInputField = app.textFields.element(matching: .textField, identifier: "stockTickerSymbolSearchInput")

let submitBtn = app.otherElements.element(matching: .other, identifier: "stockTickerSymbolSearchBtn")

if (textInputField.exists && submitBtn.exists) {
    textInputField.tap()
    textInputField.typeText("TWTR")
    submitBtn.tap()
}
Assertions
Assertions allow us to compare a result with an expected value. It's an important to use assertions to validate whether the actions performed in an automation test match the expected behavior. Apple provides a set of XCTAssert macros we can use, and I'll highlight some of the common ones you may use or encounter:
XCTAssert(expression)
Asserts that an expression is true. It returns a failure when the expression == false.
XCTAssertEqual(expression1, expression2)
Asserts that two expressions have the same value. It returns a failure when the expression1 != expression2.
XCTAssertNotEqual(expression1, expression2)
Asserts that two expressions don’t have the same value. It returns a failure when expression1 == expression2.
XCTAssertNil(expression)
Asserts that an expression is nil. It returns a failure when expression != nil.
Here's an example of using an assertion in a test:
func testExample() throws {
	let textInputField = app.textFields.element(matching: .textField, identifier: "stockTickerSymbolSearchInput")
	let submitBtn = app.otherElements.element(matching: .other, identifier: "stockTickerSymbolSearchBtn")
	if (textInputField.exists && submitBtn.exists) {
		textInputField.tap()
    textInputField.typeText("TWTR")
    submitBtn.tap()
  }

  let companyNameText = app.staticTexts.element(matching: .staticText, identifier: "stockNameText")
  XCTAssertEqual(companyNameText.label, "Twitter, Inc.")
}
Executing Tests
From the Test Navigator in Xcode
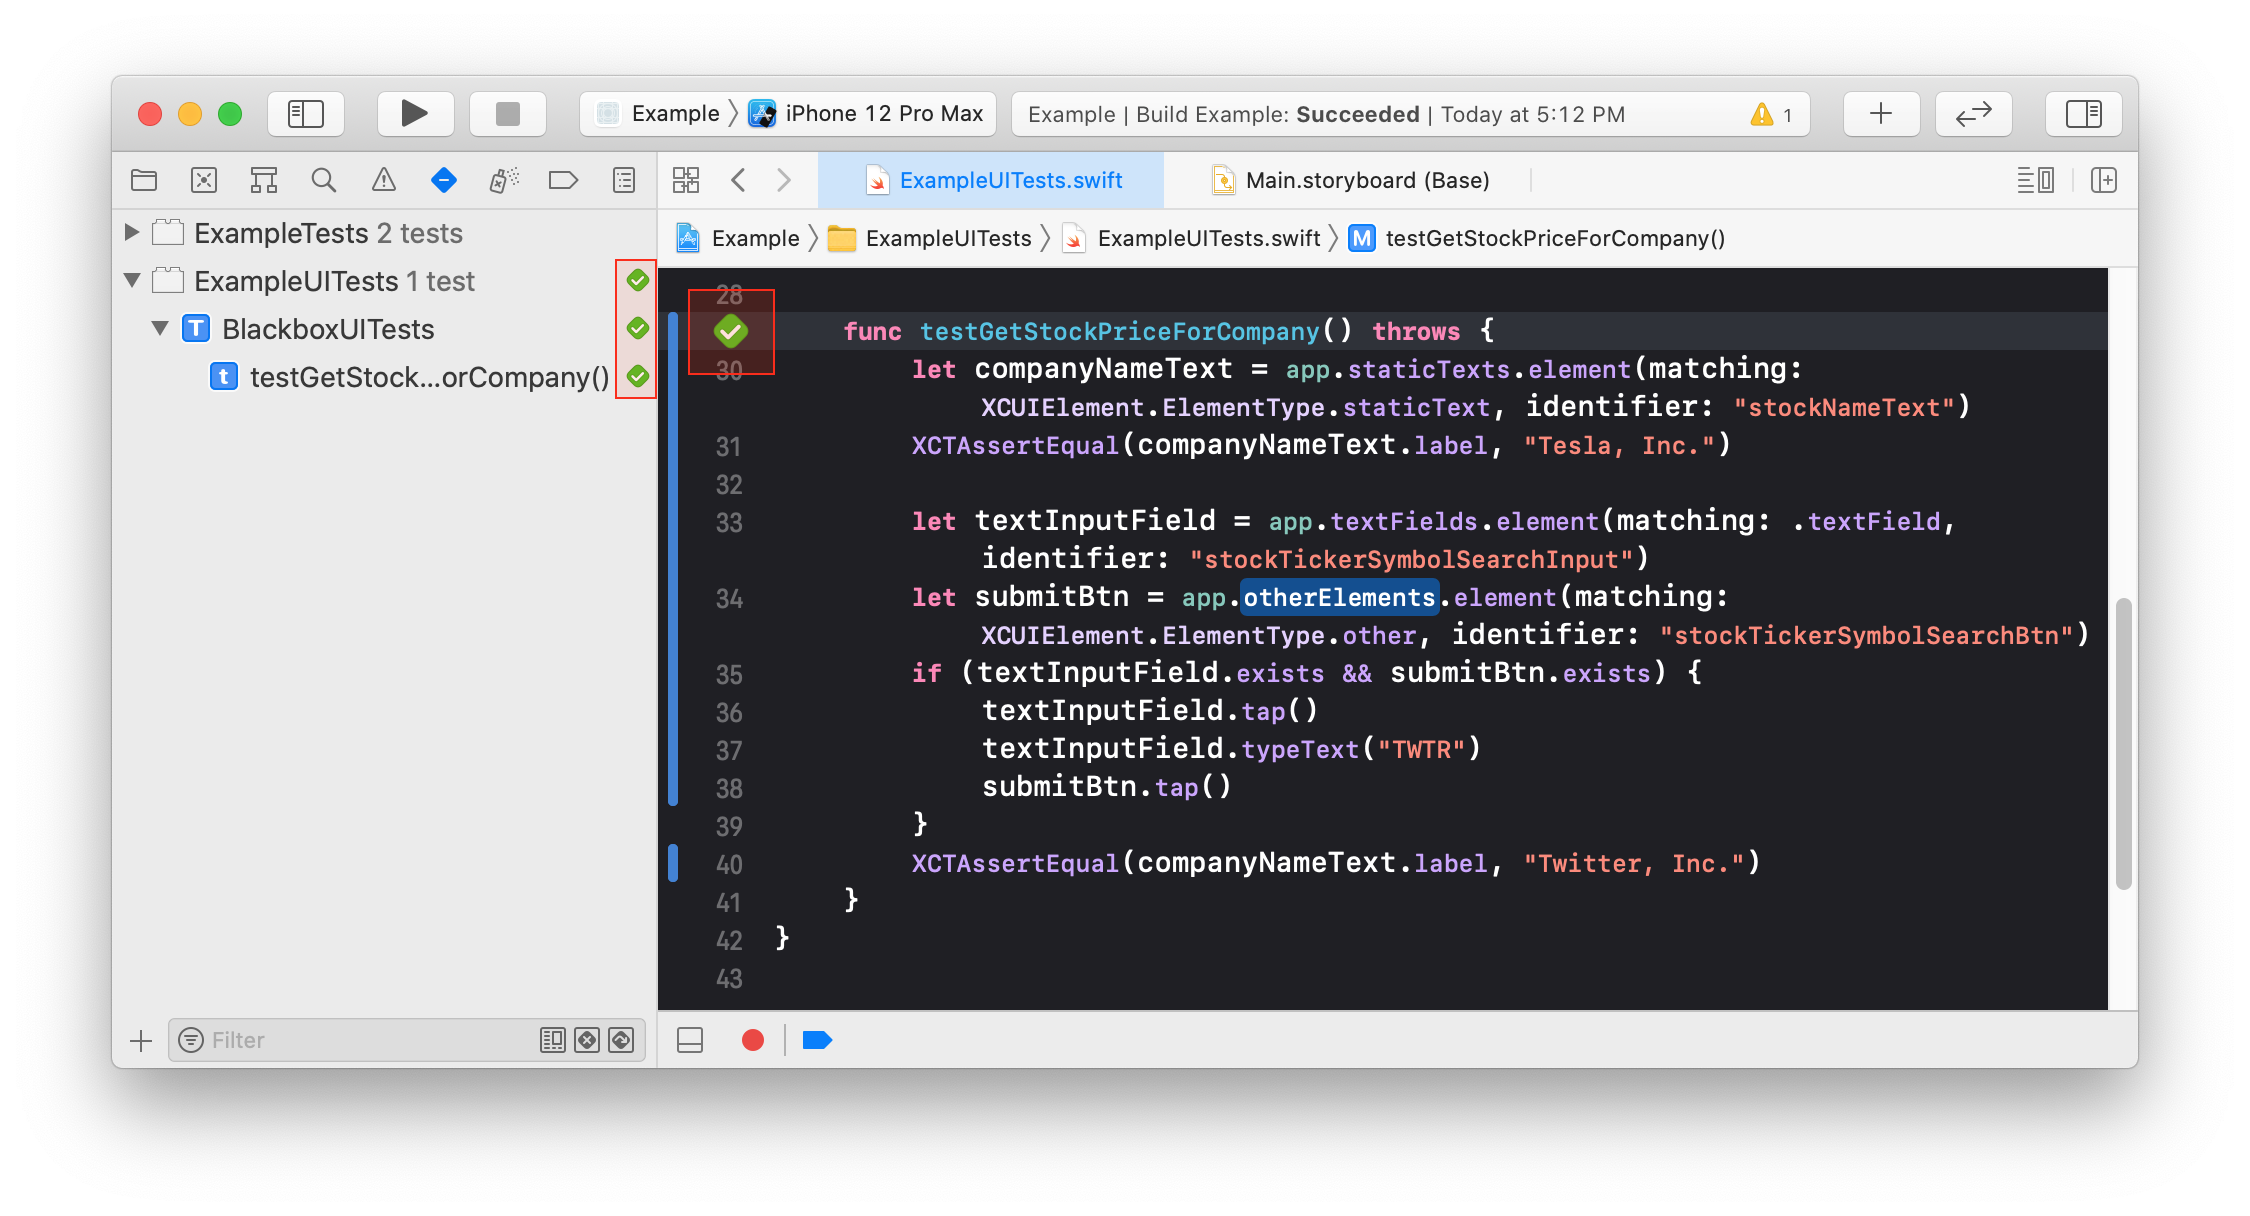
Xcode makes running your tests from the IDE interface a very intuitive process. In the Test Navigator section, there will be diamond shaped play buttons for every UI test class you create in the test group, allowing you to either:
- Run all the tests in a Test Group
- Run a specific Test Suite
- Run a specific Test Case function in a Test Suite
Additionally, Xcode will display the diamond shaped play button inline with the text editor section itself.
Creating a new Test Scheme in Xcode
It's a common practice to create a new build scheme for running your UI automation tests. One reason is that if you execute your tests from the Product > Test section of the macOS menu bar in Xcode (or it's associated keyboard shortcut), your unit tests (if you have any) will be run first in addition to your UI tests by default. As a result, you'll have to wait for all of your unit tests to complete before your UI tests run.
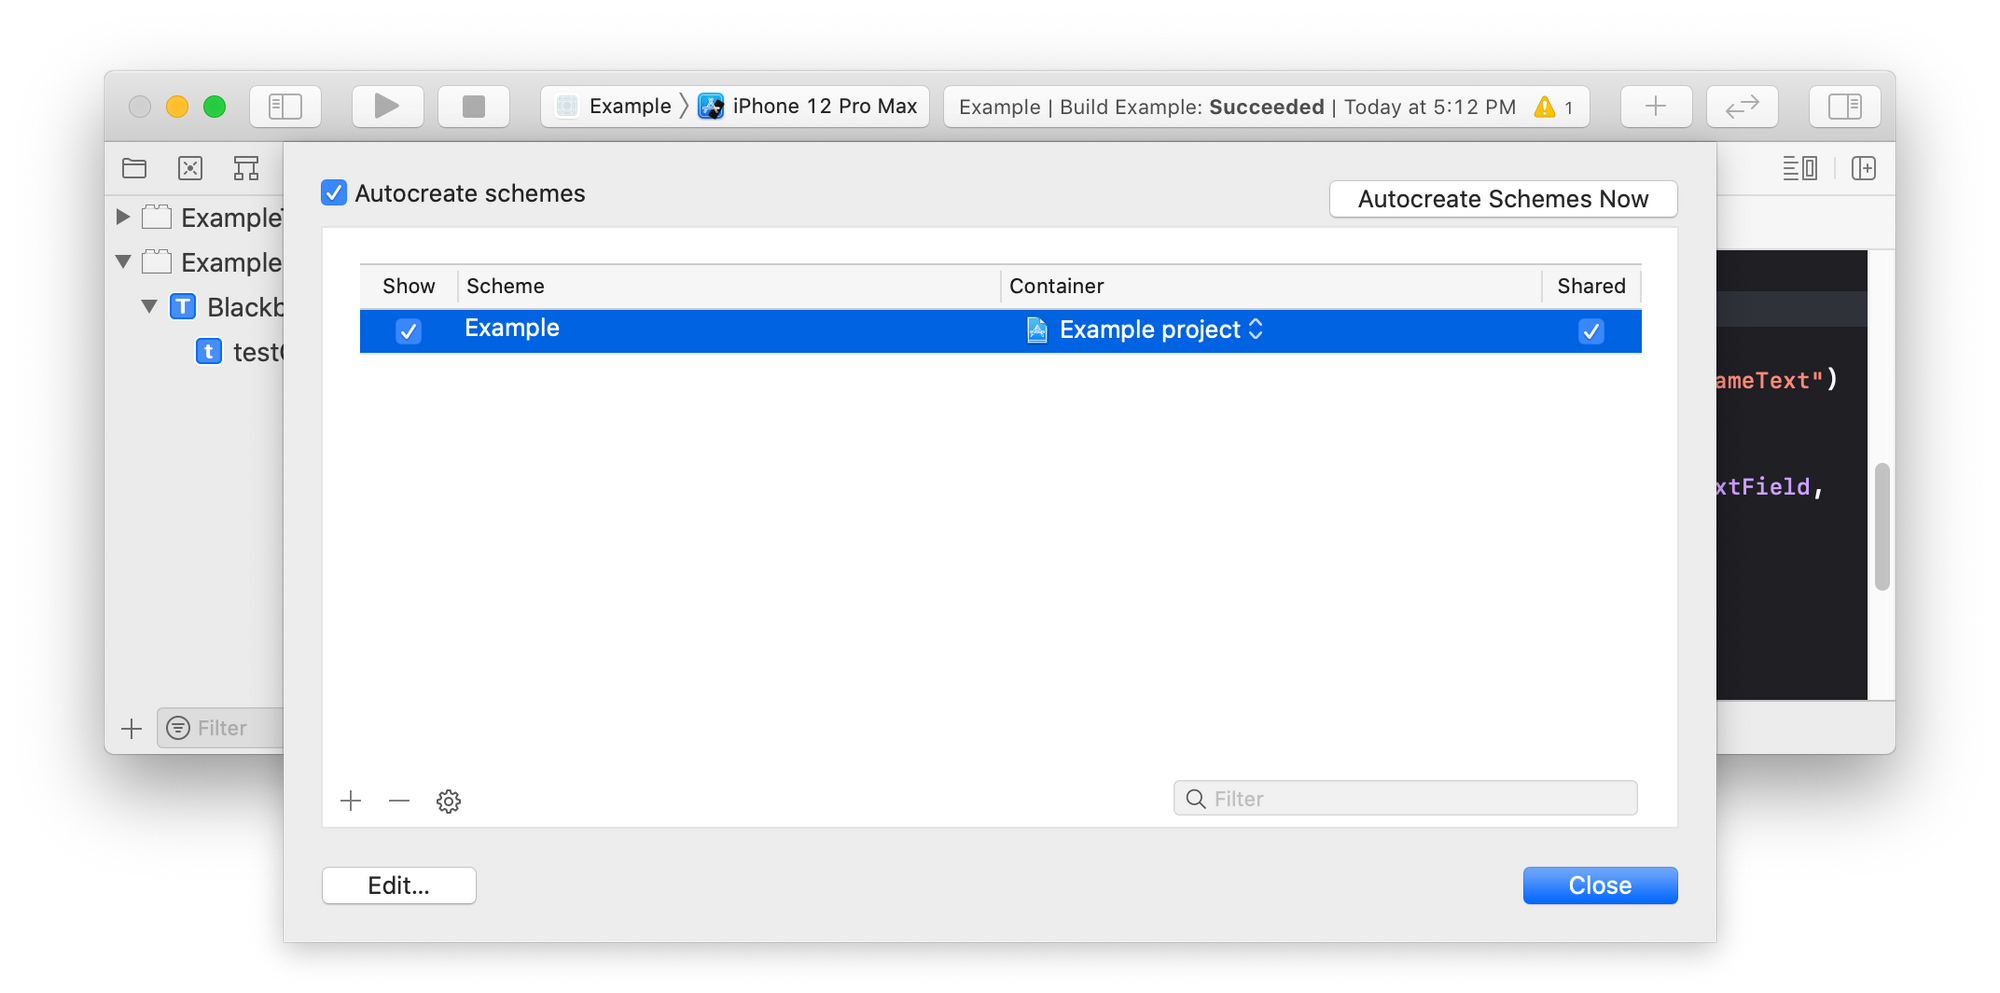
To change this behavior, we can create a build scheme for only running our UI tests. To do this, select Product > Scheme > Manage Schemes... from the macOS menu bar in Xcode. You'll see a list of existing build schemes in your project.
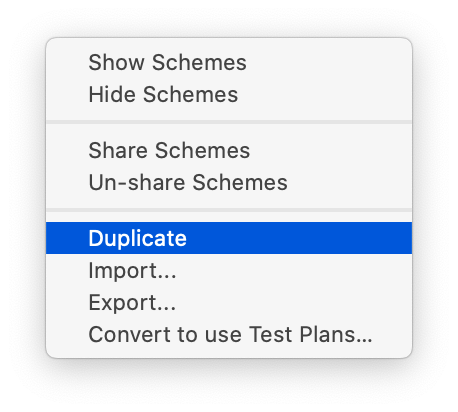
Click on your current build scheme, then click the settings gear icon at the bottom-left corner of the scheme list, and then select Duplicate.
Provide a name for your new scheme, click on the Test section, and uncheck the unit tests group.

You can now execute this scheme from the Product > Test section of the macOS menu bar in Xcode (or its associated keyboard shortcut).
Using the xcodebuild CLI
When you install Xcode, and its associated CLI tools, there will be a binary called xcodebuild made accessible to you from your PATH. We can use xcodebuild to execute our UI tests exclusively from the command line, without needing the Xcode IDE to be running. Here is what you need to provide to xcodebuild:
$ xcodebuild \
  -project "Example.xcodeproj" \
  -scheme "Stock Price App UI Tests" \
  -destination "platform=iOS Simulator,name=iPhone 12 Pro Max,OS=14.2" \
  test
-project
This will be the path to your .xcodeproj on your machine
-scheme
This will be the Scheme name in your tests. In the previous section we created a scheme only for UI tests, which you can provide here.
-destination
The destination your target device, expressed as a string. To know what values to use for your target device, you can run:
$ xcrun xctrace list devices
Blackbox Testing
Since we have the ability to initialize XCUIApplication to target a preinstalled app on the device, via a bundle identifier, we can write XCUITests for apps that we don't have the source code for. However, still we need a way to inspect the view hierarchy of the app to automate against it. Fortunately, we can use Appium Desktop as a solution for this exact purpose. Please check out a previous article I wrote that showcases how to use Appium Desktop, albeit in a different context. If you want me to go into more detail on using Appium Desktop as part of a blackbox testing process, let me know in the comments section below.
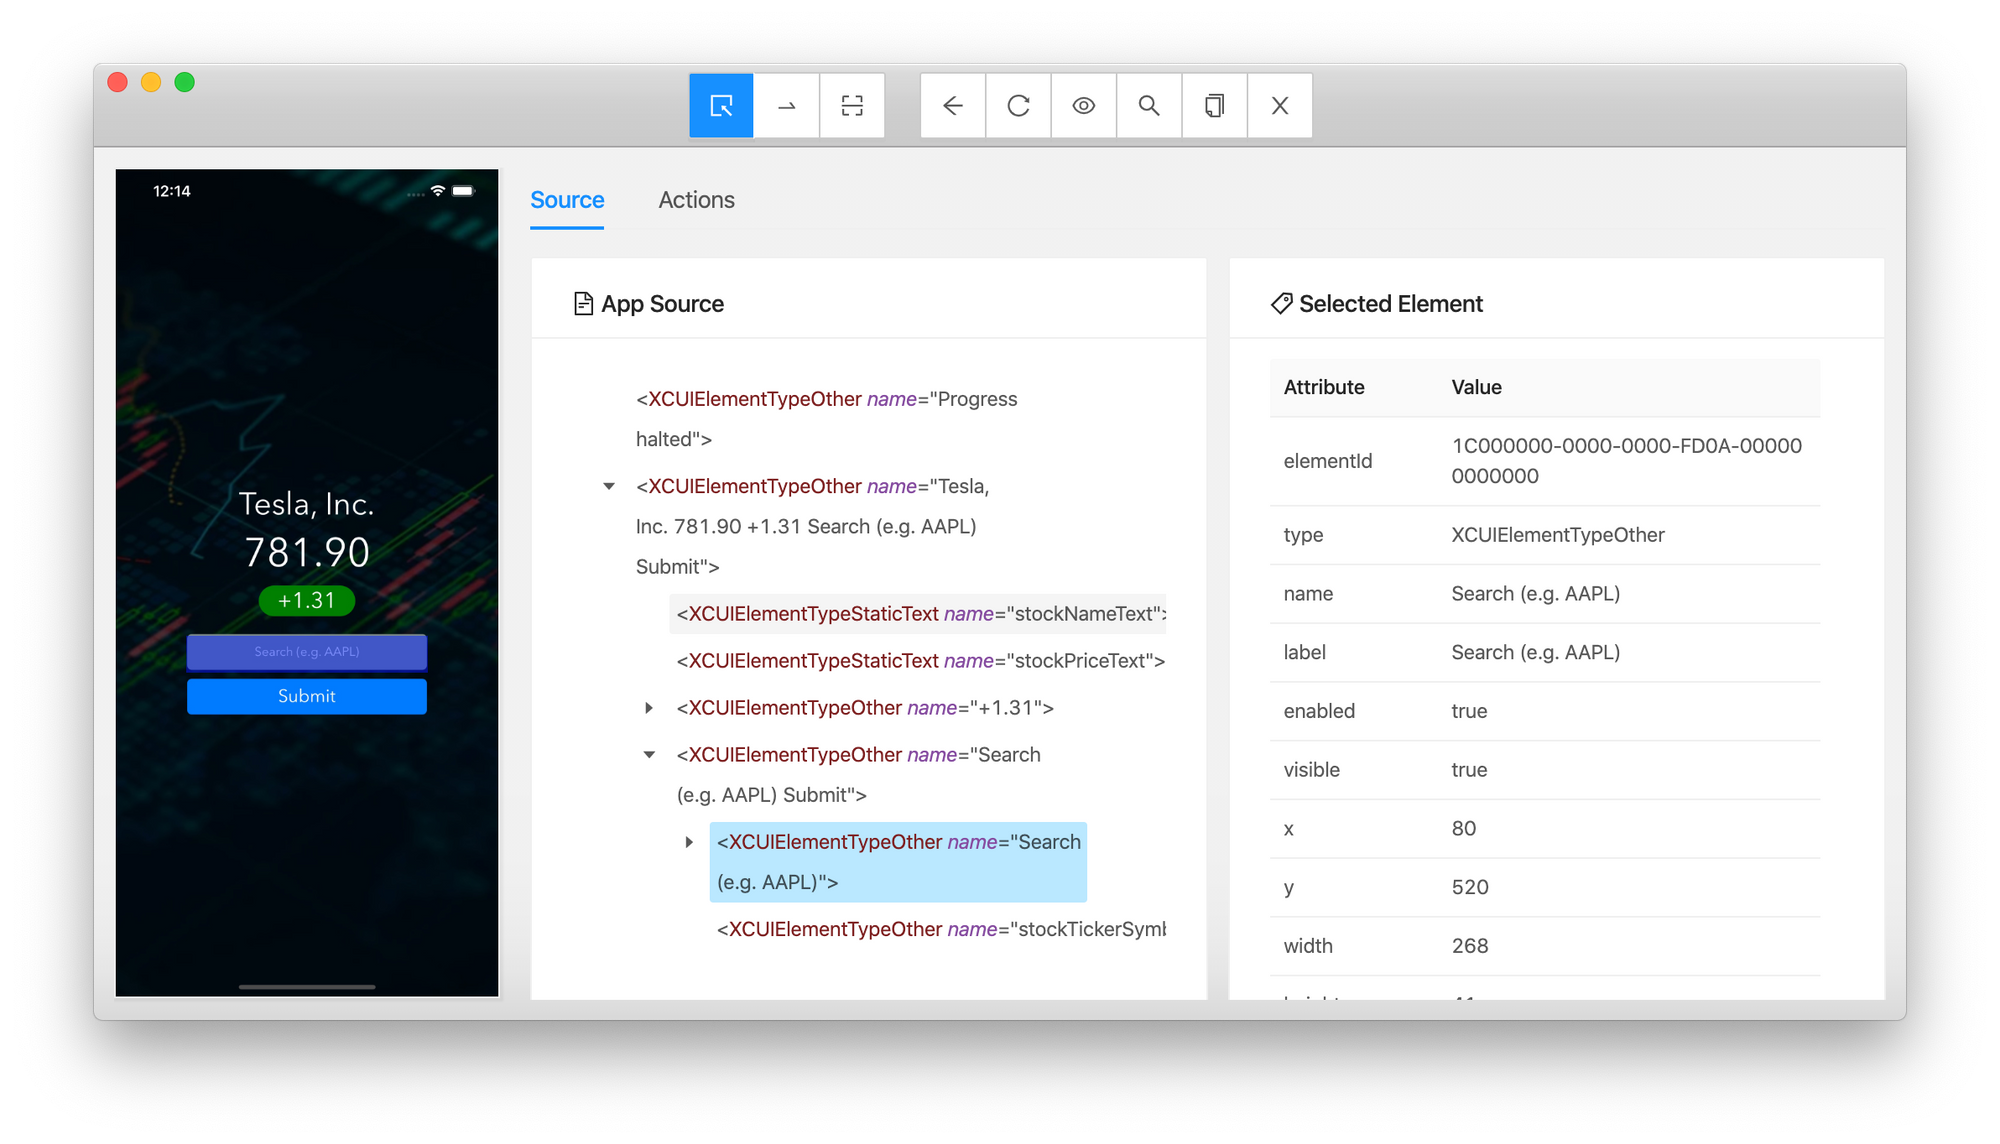
You can inspect the elements in each view of the app to learn their associated XCUIElement.ElementType and helpful properties like the accessibility id, if the element is reachable, text label strings, etc.
Conclusion
Congratulations, you now know how to add support for UI testing to your Xcode project and write tests using the XCUITest framework! 🎉 Go forth into the world and build + test great things.
Member discussion