Using XCTest and XCTestCase for iOS Tests
For a native iOS project, XCTest is the de facto framework used for writing tests for your app. It is part of Xcode and does not require any additional dependencies to use. XCTest is also the name of the base class for creating and executing Unit and UI Tests. To define a test case, there is a subclass of XCTest that we must inherit from: XCTestCase. If you have not written tests in iOS before, using the XCTest framework may seem foreign at first. In this guide, we will walkthrough XCTestCase, and its associated lifecycle methods, to ensure your getting started experience is smooth!
Contents of this Guide
- Creating a new XCTestCase
- Prerequisite: Adding a Test Target to your Project
- Subclassing XCTestCase
- Exploring the Test Case
- XCTestCase Lifecycle Methods
- How an XCTestCase is Executed
Creating a new XCTestCase
To create a new test class, we need to first subclass XCTestCase. A general rule of thumb for Unit tests is to create a test class for each class in your main iOS project group. For UI tests, a good starting point is to create a test class for each view in your app. The prerequisite here is to ensure that your project has a test target for your Unit and/or UI tests.
Prerequisite: Adding a Test Target to your Project
If your Xcode project doesn’t already have a test target for either Unit or UI tests, you’ll first need to create them. As a quick refresher, a target in Xcode represents a product to build. In iOS development, a target is typically thought of as the app, but it can also be a framework or library, such as a unit or UI test bundle.
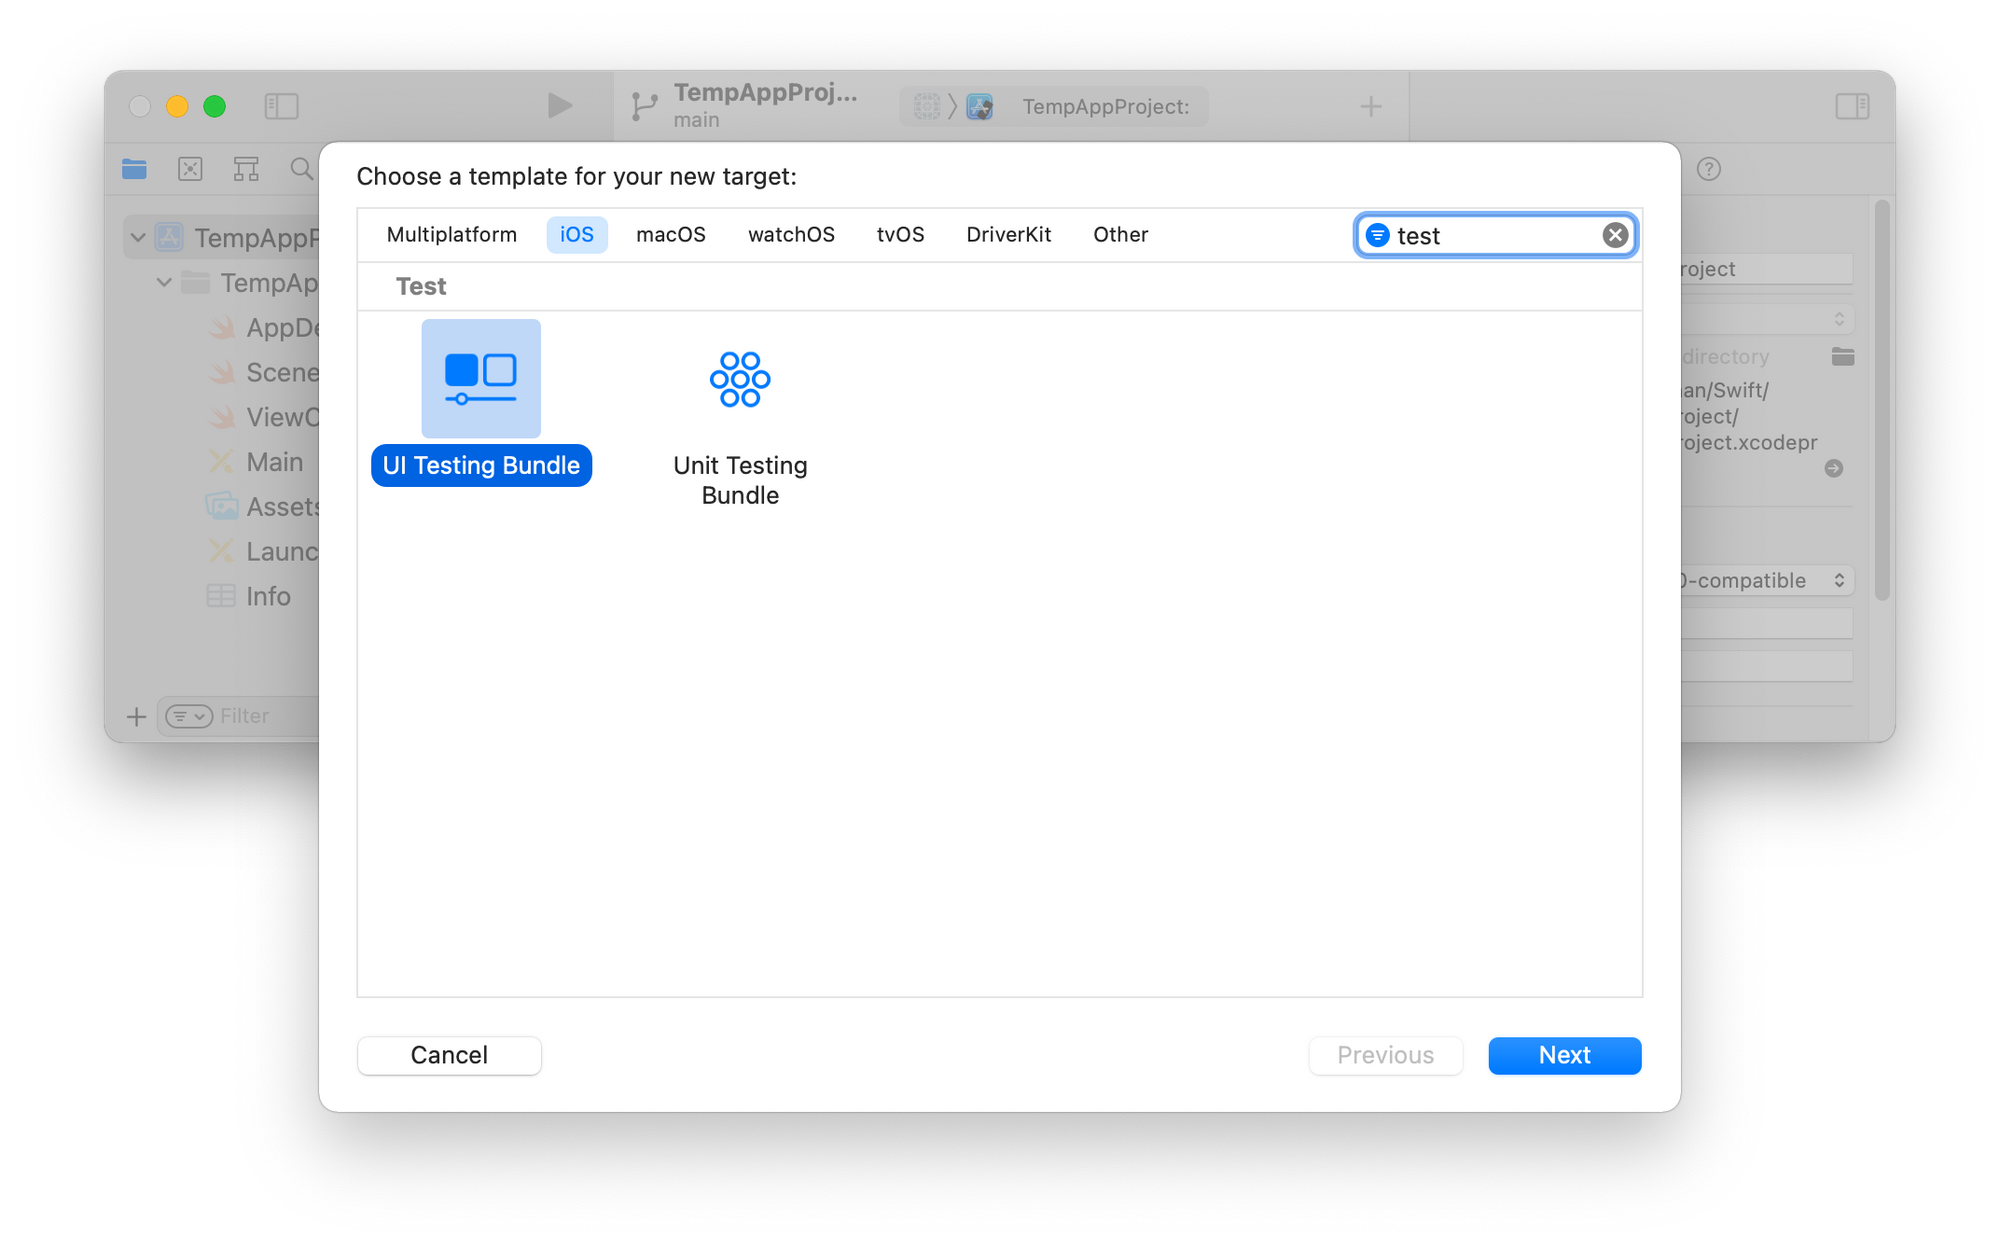
To add a new test target, select File > New > Target… from the macOS menu bar and select either “UI Testing Bundle” or “Unit Testing Bundle” depending on what type of test you want to add to your project.
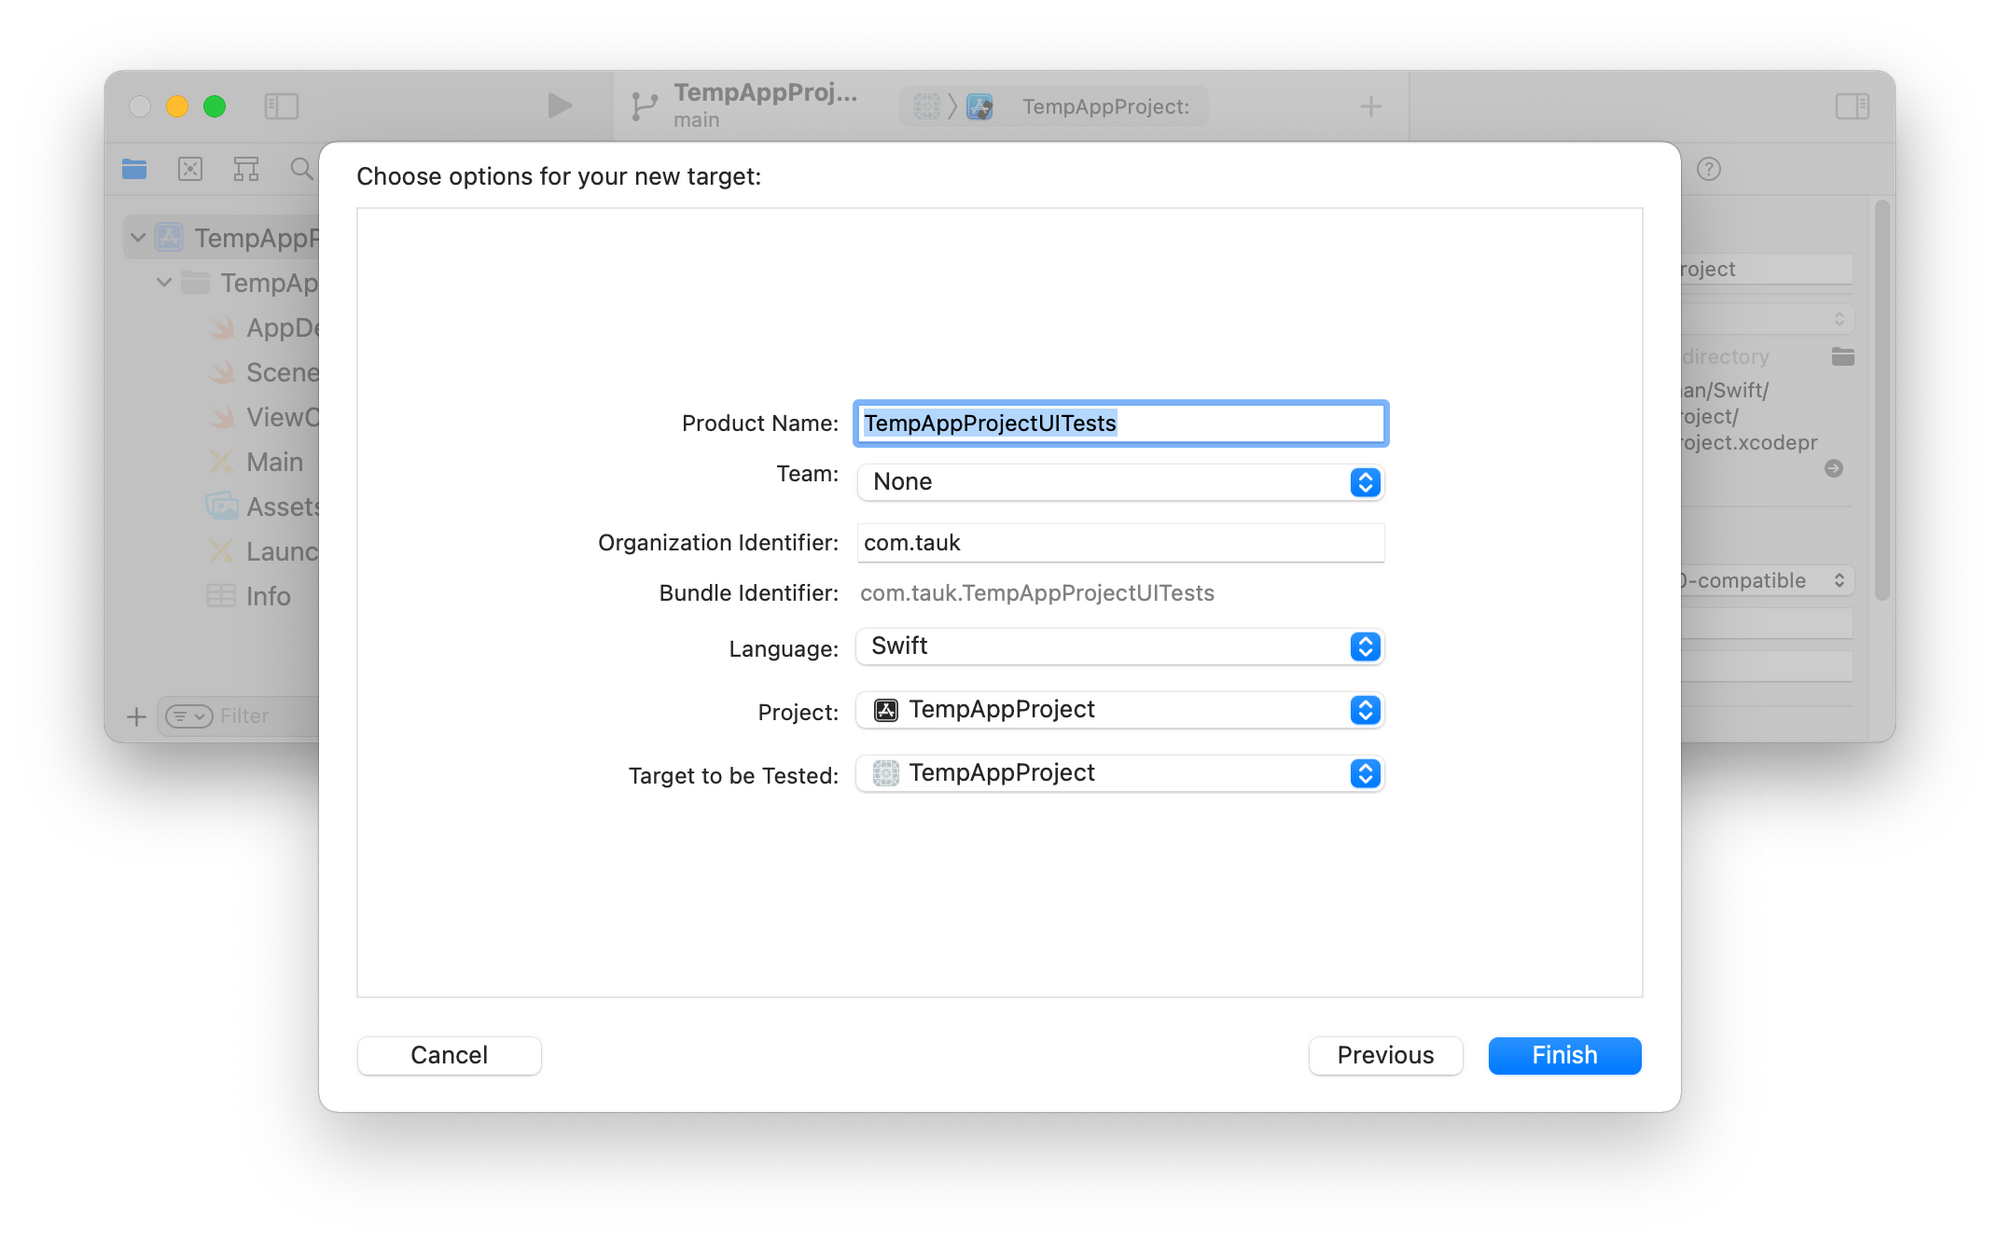
After selecting “Next” you will see a new dialog that similar to the usual values you would supply for a new project. Ensure that the “Target to be Tested” is the app you would like to test against.
Subclassing XCTestCase
To create a new test case in Xcode, select File > New > File from the macOS menu bar and select either “UI Test Case Class” or “Unit Test Case Class” depending on what type of test you want to add to your project.
Provide a name for your test class, verify that “Subclass of: XCTestCase” is selected (this should be the default option), and click on “Next.”

In this next step, verify the Group and Target the test class belongs to.
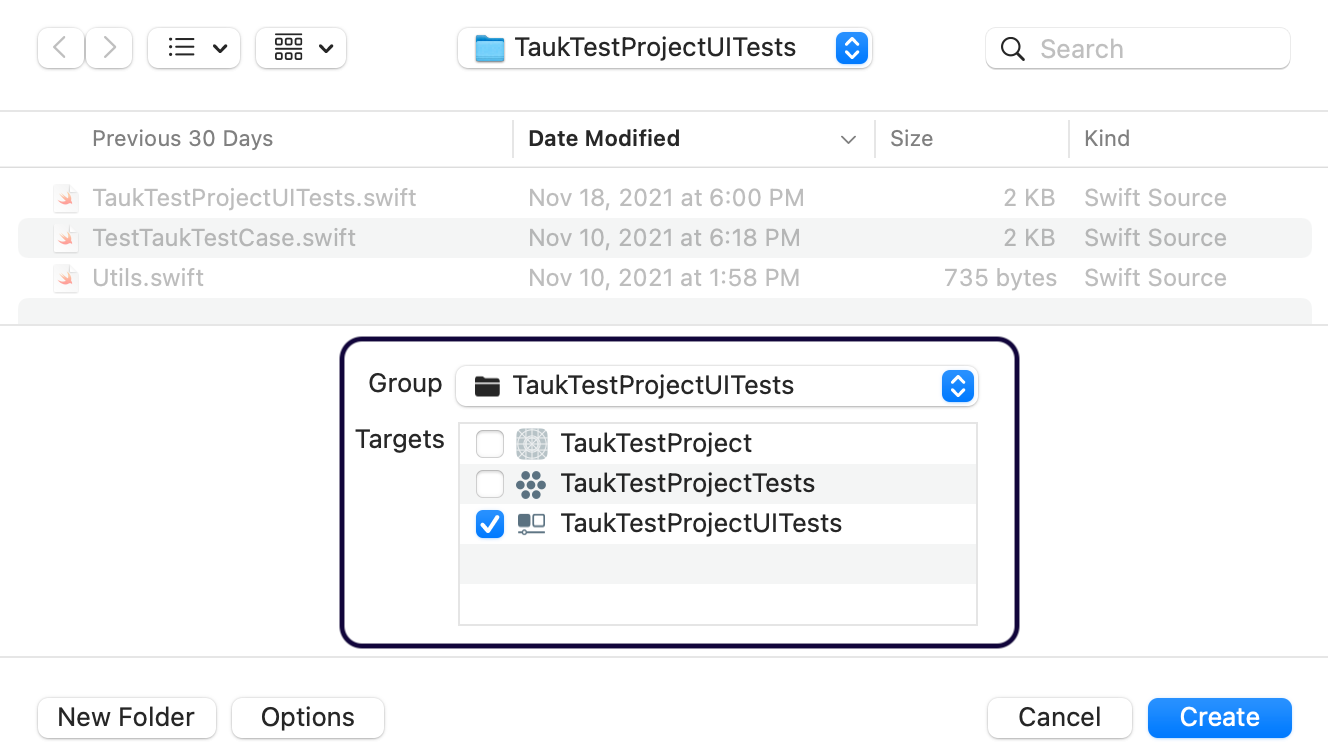
For additional context, when you create a test bundle, Xcode will create a separate target for it. In the screenshot above, the example project has a target for the Unit tests and UI tests, which is why we see “TaukTestProjectTests” and “TaukTestProjectUITests” respectively. This is very important to be aware of since test classes cannot be part of your main app target, which is “TaukTestProject” in this example screenshot.
Exploring the Test Case
Xcode has created a barebones Test Case class for us that looks like this:
import XCTest

class ExampleTestCase: XCTestCase {

    override func setUpWithError() throws {
        // Put setup code here. This method is called before the invocation of each test method in the class.

        // In UI tests it is usually best to stop immediately when a failure occurs.
        continueAfterFailure = false

        // UI tests must launch the application that they test. Doing this in setup will make sure it happens for each test method.
        XCUIApplication().launch()

        // In UI tests it’s important to set the initial state - such as interface orientation - required for your tests before they run. The setUp method is a good place to do this.
    }

    override func tearDownWithError() throws {
        // Put teardown code here. This method is called after the invocation of each test method in the class.
    }

    func testExample() throws {
        // Use recording to get started writing UI tests.
        // Use XCTAssert and related functions to verify your tests produce the correct results.
    }

}
I’ll summarize the key takeaways:
import XCTest— In order to create a subclass of XCTestCase, we need to first import the XCTest framework.class ExampleTestCase: XCTestCase— To create a test case, you will need to subclass from XCTestCase.override func setUpWithError()— This is a lifecycle method that runs before every test method is executed.override func tearDownWithError()— This is a lifecycle method that runs after every test method is executed.func testExample()— This is an example test method that was generated for us and we can rename it. In XCTest the naming convention is to preface "test" before the name of the method. As an example, here's a valid test method name:testGetStockPriceForCompany(). Also note that test methods don't have any arguments.
setUpWithError() and tearDownWithError() are two of the lifecycle methods available in XCTestCase, but there are others we can use as well. In the next section, we'll explore the XCTestCase lifecycle methods.
XCTestCase Lifecycle Methods
XCTestCase lifecycle methods allow you to prepare the initial state before tests run, and perform cleanup activities after tests complete. The lifecycle methods are a bit different than what you would expect from standard Swift class methods. Test cases are part of a test runner provided by the XCTest framework. The test runner calls the test methods based on when they should be called during the lifecycle of the test execution.
Here’s an overview of the lifecycle methods you can use from subclassing XCTestCase:
class ExampleTestCaseWithLifecycleMethods: XCTestCase {

    override class func setUp() {
				super.setUp()
        /*  This is the setUp() class method.
            It is called before the first test method begins.
            Set up any overall initial state here. */

    }

    override func setUpWithError() throws {
        /*  This is the setUpWithError() instance method.
            It is called before each test method begins.
            Set up any per-test state here. */
    }

    func testMethod1() throws {
        // This is an example test method.

        addTeardownBlock {
            // Called when testMethod1() ends.

        }
    }

    func testMethod2() throws {
        // This is another example test method

        addTeardownBlock {
            // Called when testMethod2() ends.
        }
    }

    override func tearDownWithError() throws {
				try super.tearDownWithError()
        /*  This is the tearDownWithError() instance method.
            It is called after each test method completes.
            Perform any per-test cleanup here from side effects
						that setUpWithError() may have caused. */
    }

    override class func tearDown() {
				super.tearDown()
        /*  This is the tearDown() class method.
            It is called after all test methods complete.
            Perform any overall cleanup here from side effects
						that the class method setUp() may have caused. */
    }

}
To summarize:
- The class method
setUp()can be overridden if you need to do an initial setup that runs before all the tests are executed. - The method
setUpWithError() throwscan be overridden if you need to run setup logic before each individual test method is executed. - Test methods start with the name “test” followed by the name you would like to provide. Test methods do not have any arguments. A test method passes if it doesn’t have any failed assertions or errors.
- The method
tearDownWithError() throwscan be overridden if you need to clean up any side effect your test method may have caused. It's called after each test method completes. - The class method
tearDown()can be overridden if you need to clean up any setup code you did before the tests started to run.
How an XCTestCase is Executed
Behind-the-scenes, the XCTest framework creates an XCTestCase instance for every test method and adds it to its test runner queue before the test execution actually begins. For example, if you have a test class called RetrieveStockPriceTests that contains three test methods, XCTest creates three instances of RetrieveStockPriceTests and adds them to its test runner. The three instances get deallocated only after all the tests have finished their execution.
This is important to be aware of so you know how state is managed during the test runtime execution. A key takeaway here is that you cannot share an instance variable value across different test methods, since each one of those methods has its own class instance.
Summary
Although XCTest is a vast framework, the salient and practical bits are now hopefully demystified. You now know how to subclass XCTestCase and utilize its lifecycle methods to structure a test! 🎉 Go forth and test great apps.
Member discussion