Part 3: Building and testing native mobile apps with React Native and WebdriverIO
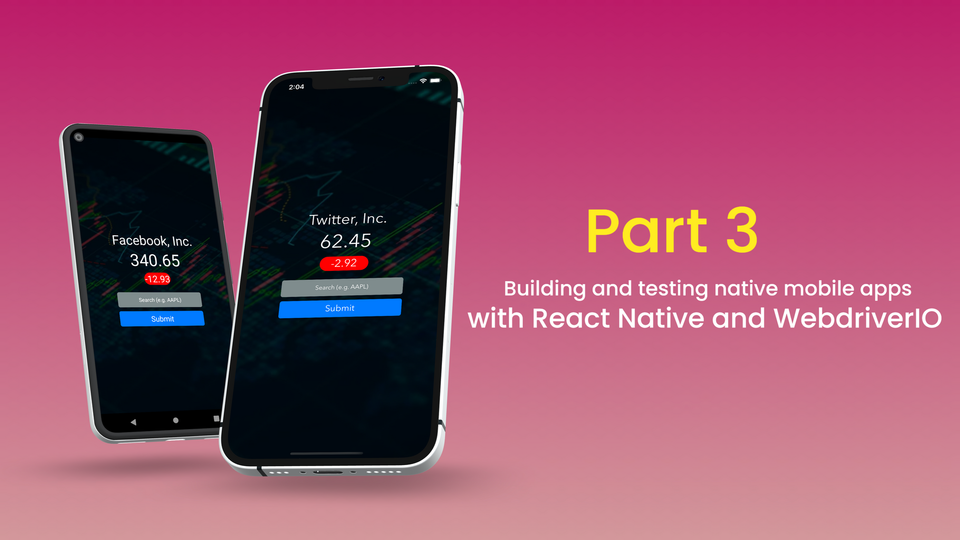
We have reached the conclusion of the trilogy! To recap the adventure to date, in Part 1 we built an app for iOS and Android using React Native. In Part 2 we refactored our app to make it test automation friendly. With the groundwork set forth, we are ready to write an end-to-end automation test.
Using WebdriverIO we can develop cross-platform automation tests entirely in JavaScript, without context switching between Swift and Kotlin. Through having automation tests, we gain assurance that future code changes made in our app won’t negatively affect the user experience.
You can find the full source code for this React Native project here:
 nathankrishnan
Contents of this Guide
● Prerequisites
- WebdriverIO
- Mocha
- Babel
- Appium Server
● Setting up our Test Project
- Test Configuration
- Helper Functions
● Creating a View Object
● Structuring the Test Suite
- Using the Mocha Framework
- Executing the Test Suite
Prerequisites
WebdriverIO
WebdriverIO is a popular JavaScript Appium client that provides its own API for issuing Appium commands. We can install as a development dependency from yarn:
$ yarn add webdriverio --devNote: The --dev flag ensures that our package is downloaded as a development dependency and will be listed under the devDependencies list in our package.json. We are adding it in this manner to signify that this package doesn't need to be shipped with the app source code.
Mocha
Mocha is a popular framework for structuring and running test suites, traditionally used by developers writing unit tests in JavaScript projects. Using Mocha in our project will provide a uniform template for structuring our test suites. We can install it as a development dependency from yarn:
$ yarn add mocha --devBabel
Babel is a JavaScript compiler that allows us to use the latest and greatest JavaScript language features in NodeJS. For example, NodeJS doesn’t support the ES6 package import syntax by default, but by using Babel in our project we can use it. Expo took care of setting up Babel for our React Native project and we will now set it up for our automation tests. We can install it as a development dependency from yarn:
$ yarn add @babel/preset-env --devWe will also add a configuration file in our project to make use of the Babel development dependency. In our project’s root directory create a file named .babelrc and add the following contents to it:
{
  "presets": [
    [
      "@babel/preset-env",
      {
        "loose": true
      }
    ]
  ]
}
Appium Server
WebdriverIO acts as our Appium client, but we need to also run Appium Server, which will act as a bridge to translate the actions in our tests to the necessary logic in either UIAutomator2 or XCUITest behind the scenes. We’ll install it globally from npm:
$ npm install --global appiumNote: We will install Appium Server globally to give us the flexibility of running it outside the context of our project’s working directory.
Setting up our Test Project
In our project’s working directory create a directory named tests. If you run ls in your terminal this what our project directory currently looks like:
.
├── App.js
├── README.md
├── app.json
├── assets
├── babel.config.js
├── components
├── node_modules
├── package.json
├── tests
├── utils
└── yarn.lock
In the tests directory, we will create our automation test and several helpful supporting classes and functions. We will setup the scaffold now and I will explain as we proceed. Within the tests directory create a file named stockPriceApp.js and two subdirectories named utils and viewObjects. This is what our tests directory looks like now:
tests
├── utils
├── viewObjects
└── stockPriceApp.js
The stockPriceApp.js file will contain our test suite. However, there are a few preparation tasks for us to perform before we officially write our test.
Test Configuration
In the utils directory we will create a configuration file for our upcoming test suite to use. Create a file in the utils directory named testConfig.js. In this file add the following contents:
export default class TestConfig {
	static webdriverPath = '/wd/hub';
	static webdriverPort = 4723;

	static androidBaseCapabilities(appPackage, appActivity) {
		const desiredCapabilities = {
      		platformName: "Android",
			automationName: "UiAutomator2",
      		deviceName: "Android Emulator",
      		appPackage: typeof appPackage !== 'undefined' ? appPackage : "com.nathankrishnan.stockprice",
      		appActivity: typeof appActivity !== 'undefined' ? appActivity : "host.exp.exponent.LauncherActivity",
      		automationName: "UiAutomator2",
		}

		return {
			path: this.webdriverPath,
			port: this.webdriverPort,
			capabilities: desiredCapabilities
		}
	}

	static iosBaseCapabilities(bundleId) {
		const desiredCapabilities = {
			platformName: "iOS",
			automationName: "XCUITest",
			deviceName: "iPhone 12 Pro Max",
			platformVersion: "14.2",
			bundleId: typeof bundleId !== 'undefined' ? bundleId : "com.nathankrishnan.stockprice"
		}

		return {
			path: this.webdriverPath,
			port: this.webdriverPort,
			capabilities: desiredCapabilities
		}
	}
}
Our TestConfig class has factory methods for creating a RemoteOptions object that WebdriverIO can use for setting up our Appium session. Let's sift through this:
- Appium has a client-server architecture. In our project, WebdriverIO is our Appium client that will make requests on our behalf to the Appium Server, in order for our desired automation actions to be performed. To reach the Appium Server, the client must provide the Webdriver URL. Since we are running Appium Server locally, our Webdriver URL is:
http://localhost:4723/wd/hub. Since running Appium Server locally is a common task, WebdriverIO just needs to know thewebdriverPathandwebdriverPortbefore it attempts to connect locally. - We also define two static methods for returning the configurations needed to run an Android and iOS session. Recall that desired capabilities is an Appium term for specifying how you want your test to work. For our tests, we will run them on a local Android Emulator and iOS Simulator. If an (
appPackage,appActivity) orbundleIdisn't specified, it will default to the associated ones for the app we built. Recall, that we set these values in ourapp.jsonin Part 2. I went withcom.nathankrishnan.stockpricefor my project.
Helper Functions
We will also create helper functions to facilitate actions we want to perform in our app, such as: finding an element, tapping an element, and sending keyboard input to an element. In the utils directory create another file called elementActions.js. In this file add the following contents:
// Wait up to 5 seconds
const MAX_ELEMENT_WAIT_THRESHOLD_MS = 5000;

async function findElement(driver, elementSelector, timeout = MAX_ELEMENT_WAIT_THRESHOLD_MS) {
	const element = await driver.$(elementSelector);
	await element.waitForExist({ timeout });
	return element;
}

async function tapElement(driver, elementSelector, timeout = MAX_ELEMENT_WAIT_THRESHOLD_MS) {
	const element = await findElement(driver, elementSelector, timeout);
	return element.click();
}

async function setValueOnElement(driver, elementSelector, value, timeout = MAX_ELEMENT_WAIT_THRESHOLD_MS) {
	const element = await findElement(driver, elementSelector, timeout);
	await element.setValue(value);
}

export { findElement, tapElement, setValueOnElement};
Here’s an overview of the three functions:
findElement(): Given an element selector string, check to see if the element exists in the current view. We will wait up to 5 seconds to see if the element exists and return it.tapElement(): First runfindElement()to get a reference to the element and then perform a tap action.setValueOfElement(): first runfindElement()to get a reference to the element and then send an input value.
Creating a View Object
View Object Model is a design pattern used for encapsulating the UI elements and actions within an app. In this design pattern, objects are created to contain important UI element references and actions for each view in the app. I recommend taking a look at the Structuring Automation Tests using the Page/View Object Model guide if you want to learn more.
In the viewObjects directory we created earlier, create a file named mainStockPriceView.js. In this file add the following contents:
import { findElement, tapElement, setValueOnElement } from "../utils/elementActions"

export default class MainStockPriceView {
	selectors = {
		stockNameText: "~stockNameText",
		stockPriceText: "~stockPriceText",
		stockChangeValueText: "~stockChangeValueText",
		stockTickerSymbolSearchInput: "~stockTickerSymbolSearchInput",
		stockTickerSymbolSearchBtn: "~stockTickerSymbolSearchBtn"
	}

	constructor(driver) {
		this.driver = driver;
	}

	async getStockName() {
		const stockName = await findElement(this.driver, this.selectors.stockNameText);
		return stockName.getText();
	}

	async getStockPrice() {
		const stockPrice = await findElement(this.driver, this.selectors.stockPriceText);
		return stockPrice.getText();
	}

	async getChangeValue() {
		const changeValue = await findElement(this.driver, this.selectors.stockChangeValueText);
		return changeValue.getText();
	}

	async setStockTickerSymbol(stockTickerSymbolString) {
		await setValueOnElement(this.driver, this.selectors.stockTickerSymbolSearchInput, stockTickerSymbolString);
	}

	async tapSearchBtn() {
		await tapElement(this.driver, this.selectors.stockTickerSymbolSearchBtn);
	}
}
Let’s dissect what we have added:
- We created a class called
MainStockPriceViewto represent the main view of our app. - In this class, we have created an object to store our element selector strings. Due to our preparation work in Part 2, we are able to reach all of the necessary elements through the Accessibility ID locator strategy in both the Android and iOS builds of the app.
- The
constructor()of this class takes a reference to the Appium driver object. - To facilitate the actions we want to perform in this view of the app, we’ve created associated setter, getter, and action methods. To power these methods, we’ve imported the helper functions we created in the previous section.
We are now ready to create our test suite.
Structuring the Test Suite
Using the Mocha Framework
Using the Mocha framework we installed as a development dependency, we can organize our suite using the following structure:
// Our Test Suite Name
describe('Test Suite Name', function() {

  // Setup code we can run before each test session starts
  beforeEach(function() {

  });

  // Our Test Case
  it('Test Case Name', function() {
  });

  // Teardown code we can run after each test session has executed
  afterEach(function() {
  });
});describe()will encompass our test suite in its entirety.- In the
beforeEach()hook we can start each session based on each platform's desired capabilities. - We can create test cases by adding
it()blocks. In this case we just need one test case. In theit()block we can write our test case logic. - In the
afterEach()hook we can perform any actions before we tear down and end of each test session.
Let’s revisit the stockPriceApp.js file we created in the tests directory earlier and add the following contents to it:
import { strict as assert } from 'assert';
import { remote } from 'webdriverio';
import TestConfig from './utils/testConfig';
import MainStockPriceView from './viewObjects/mainStockPriceView';

const targetPlatforms = [TestConfig.iosBaseCapabilities(), TestConfig.androidBaseCapabilities()];

targetPlatforms.forEach(function(platform) {
	describe(`Stock Price ${platform.capabilities.platformName} App Test`, function() {
		let driver;
		// Allow the entire test suite to take up to 60 seconds max to execute
		this.timeout(60000);

		beforeEach(async function() {
			const testOptions = platform;
			driver = await remote(testOptions);
		});

		it('Get the stock price of Twitter', async function() {
			const StockPriceView = new MainStockPriceView(driver);
			await StockPriceView.setStockTickerSymbol("TWTR");
			await StockPriceView.tapSearchBtn();

			const stockName = await StockPriceView.getStockName();
			const stockPrice = await StockPriceView.getStockPrice();
			const stockPriceChangeValue = await StockPriceView.getChangeValue();

			assert.equal(stockName, "Twitter, Inc.");
			assert.equal(typeof parseFloat(stockPrice), "number");
			assert.equal(typeof stockPriceChangeValue, "string");
		});

		afterEach(async function() {
			await driver.deleteSession();
		});
	});
});- In our test suite we define an array of platforms we want to run our test on, where each platform is represented by its associated capabilities object.
- The first parameter to the Mocha
describe()function is a description string we can provide to name our test suite. We interpolate the platform OS name in this description string, e.g. Stock Price iOS Test and Stock Price Android Test. - We allow each iteration of the test suite to take up to 60 seconds max to execute before killing the test session. We selected 60 seconds as the max timeout value to account for the edge case where the WebDriverAgent app is not present on target iOS Simulator and Appium Server needs to first compile & install it before our test session starts.
- In our test case we exercise the user flow of entering a stock ticker symbol (TWTR), tapping the Submit button, and then verify that the result in the view contains the company name, a stock price number, and the stock price change value string.
Executing the Test Suite
Mocha provides a test runner we can use to execute. For example we can run:
$ mocha --require @babel/register 'tests/*.js'And this will run our stockPriceApp.js test suite on both iOS and Android. The Mocha test runner can pick up our test suite because we are using Mocha's framework hooks (i.e. describe(), it(), etc.)
For added convenience, we can add a tests command to the scripts section of our package.json:
{
  ...

"scripts": {
    "start": "expo start",
    "android": "expo start --android",
    "ios": "expo start --ios",
    "web": "expo start --web",
    "eject": "expo eject",
    "tests": "mocha --require @babel/register 'tests/*.js'"
  }

  ...
}
Now we can run yarn run tests as a shortcut to execute our test suite.
Note: Before you execute test runs, ensure that you have Appium Server running in the background and your iOS Simulator and/or Android Emulator available. You can start Appium Server from your terminal by running:
$ appiumConclusion
Congratulations, you have written an end-to-end automation test targeting both iOS and Android app builds from one codebase! 🎉 Through this journey we’ve covered a lot of significant topics and you should feel proud of your accomplishments. You now know how to build and test native mobile apps with React Native and WebdriverIO.
Separately, I’m currently working on a platform that enables developers to efficiently diagnose, resolve, and optimize their automation tests. We currently have an ongoing beta program for users to try it and if you want an invitation you can join the waitlist here. Just click on “Request an Invite.”
Member discussion