Quick Start Guide for Setting Up Appium on an M1 Mac
The Apple Silicon M1 SoC in the recent Mac lineup is impressive with respect to its CPU performance and power efficiency. It also commences the 2-year transition from x86 to ARM on the Mac, which has implications in the present for software compatibility — especially when setting up a new development environment.
In this concise guide we will walkthrough the steps and considerations when setting up Appium on an Apple Silicon M1 Mac.
Contents of this Guide
● Prerequisites
- Xcode
- Xcode Command Line Tools
- Homebrew
- Carthage
- asdf
● Android Studio Setup
- Java 8 JDK
- JAVA_HOME
- ANDROID_HOME
- Android Emulator
● iOS Setup
- iOS Simulator
● Appium
- Node.js
- Appium Server
- Appium Desktop
Prerequisites
Xcode
You can Install Xcode directly from the macOS App Store.
Xcode Command Line Tools
After Xcode is installed, enter the following command in your Terminal to install Xcode’s supplementary command line tools:
$ xcode-select --installFor context, the supplementary Xcode Command Line Tools are important because they contain the Apple LLVM compiler and Make, which package managers rely on in order to install packages and associated dependencies.
Homebrew
Homebrew is a popular package manager for macOS. It has an extensive collection of packages, which it calls formulae (CLI) and casks (GUI). To install Homebrew, you can execute their interactive installation script in your terminal:
$ /bin/bash -c "$(curl -fsSL https://raw.githubusercontent.com/Homebrew/install/HEAD/install.sh)"Carthage
Carthage is a popular dependency manager for macOS and iOS projects. You can install it via homebrew:
$ brew install carthageNote: The XCUITest driver for Appium previously required Carthage being installed. However, as of Appium 1.20.0+ it’s technically not required anymore. That said, it’s still helpful to have since some optional dependencies you may want to use do require Carthage.
asdf
asdf is a convenient version manager for language runtimes. It provides a single CLI tool you can use for installing Node, Java, and other languages. For those that have used nvm before, it’s like a generalized nvm, but inclusive of other languages.
First install the requisite dependencies based on your platform. Then you can proceed to install it. For example using Homebrew on macOS:
$ brew install asdfAndroid Studio Setup
There’s an official release of Android Studio called Android Studio Arctic Fox that includes preview support for Apple Silicon. You can download from the official Android Studio releases page here.
Java 8 JDK
Using asdf we can install the Azul Zulu Builds of OpenJDK that support Apple Silicon. First we’ll add the Java plugin to asdf:
$ asdf plugin-add javaNext, we can list all the Java JDKs:
$ asdf list-all javaAnd then install the latest Java 8 Azul Zulu JDK and make it globally accessible on our system:
$ asdf install java zulu-8.56.0.23
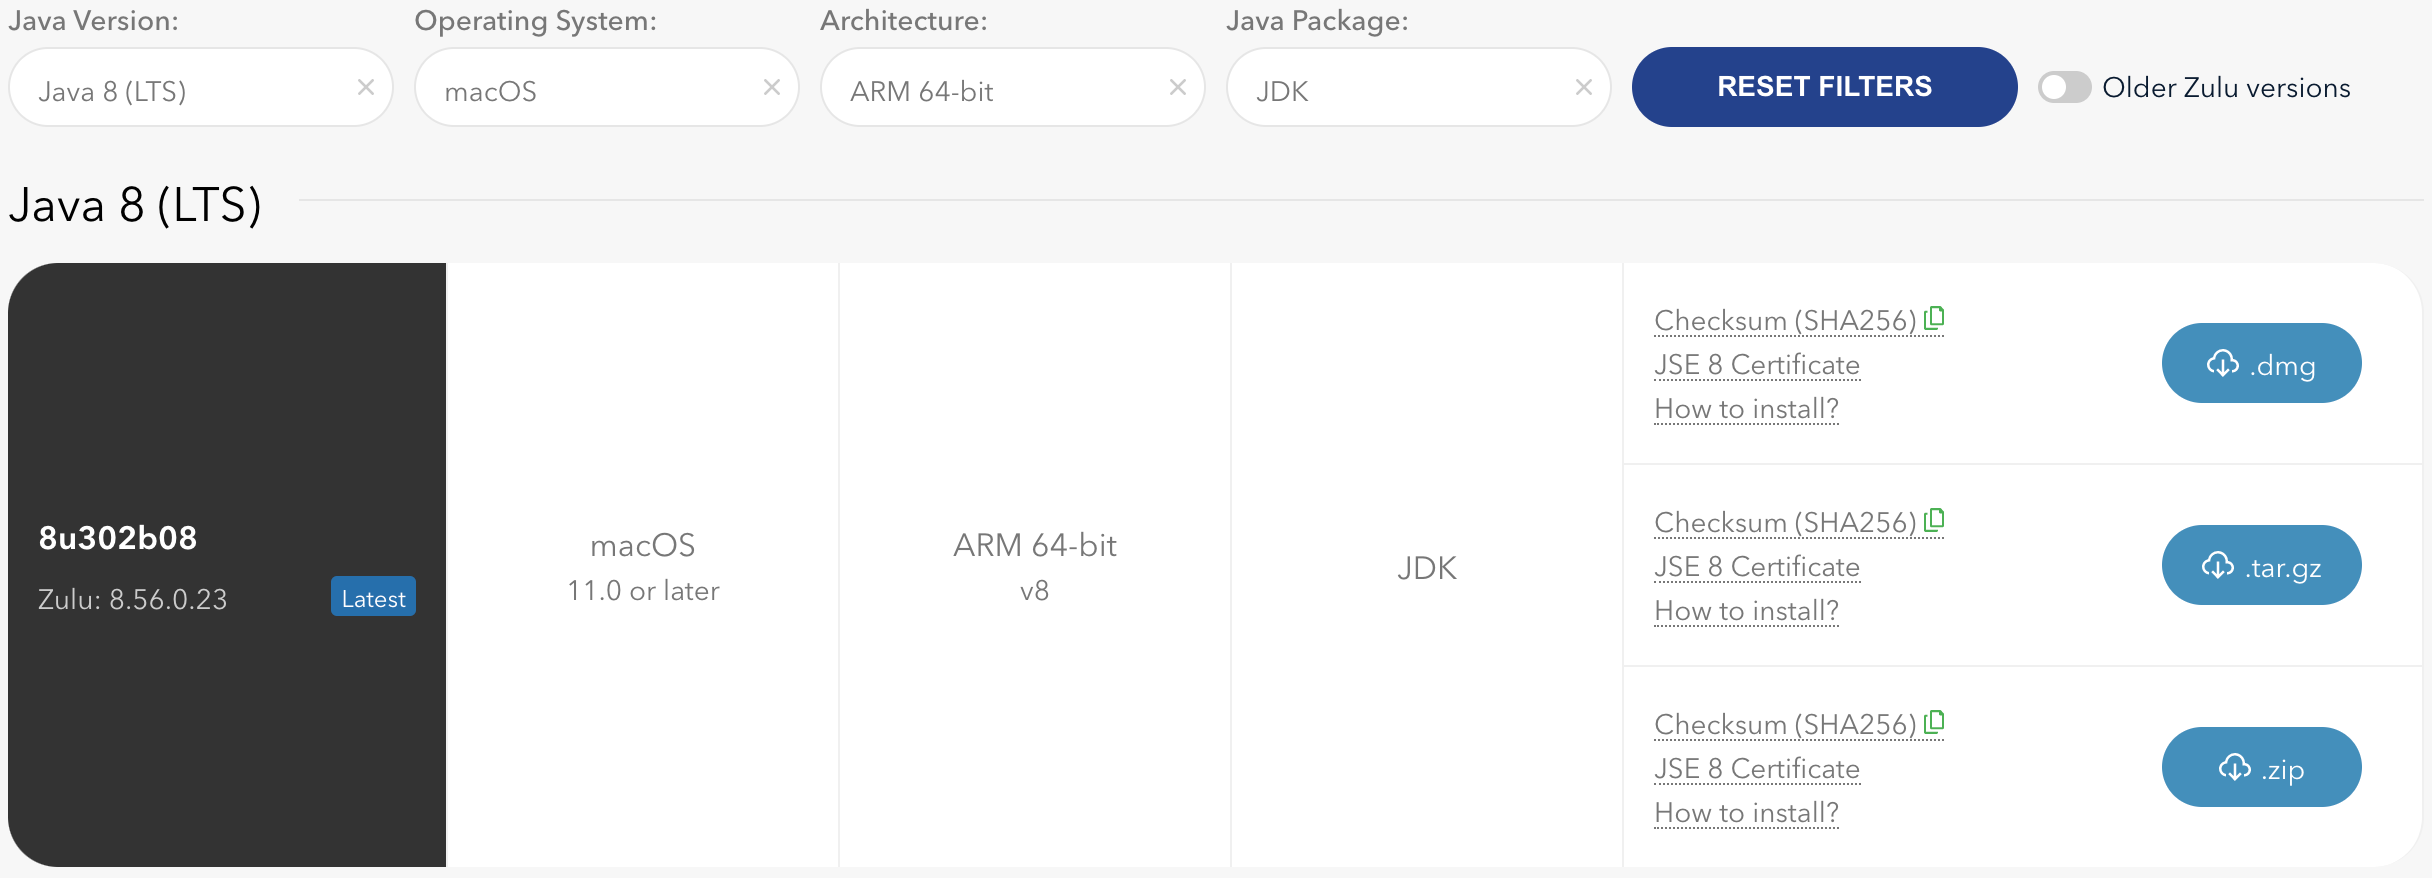
$ asdf global java zulu-8.56.0.23Note: At the time of writing this, zulu-8.56.0.23 is the latest JDK build. However, you can take a look at the Azul page to verify what the latest JDK build is. For the Architecture ensure that it’s ARM 64-bit.
JAVA_HOME
We’ll add JAVA_HOME to our path in our .zshrc file for Android Studio. When you install a Java SDK using asdf it will be installed under ~/.asdf/installs/ like such:
$ ~/.asdf/installs/java/zulu-8.56.0.23/zulu-8.jdk/Contents/HomeWe can set this in our .zshrc:
# Java
export JAVA_HOME="$HOME/.asdf/installs/java/zulu-8.56.0.23/zulu-8.jdk/Contents/Home"
Note: You can verify the JAVA_HOME path of the installed global Java SDK by running:
$ . ~/.asdf/plugins/java/set-java-home.zshANDROID_HOME
We’ll add ANDROID_HOME to our path in our .zshrc to ensure we have CLI access to all of the Android SDK components, such as the emulator and platform tools:
# Android Home
export ANDROID_HOME="$HOME/Library/Android/sdk"
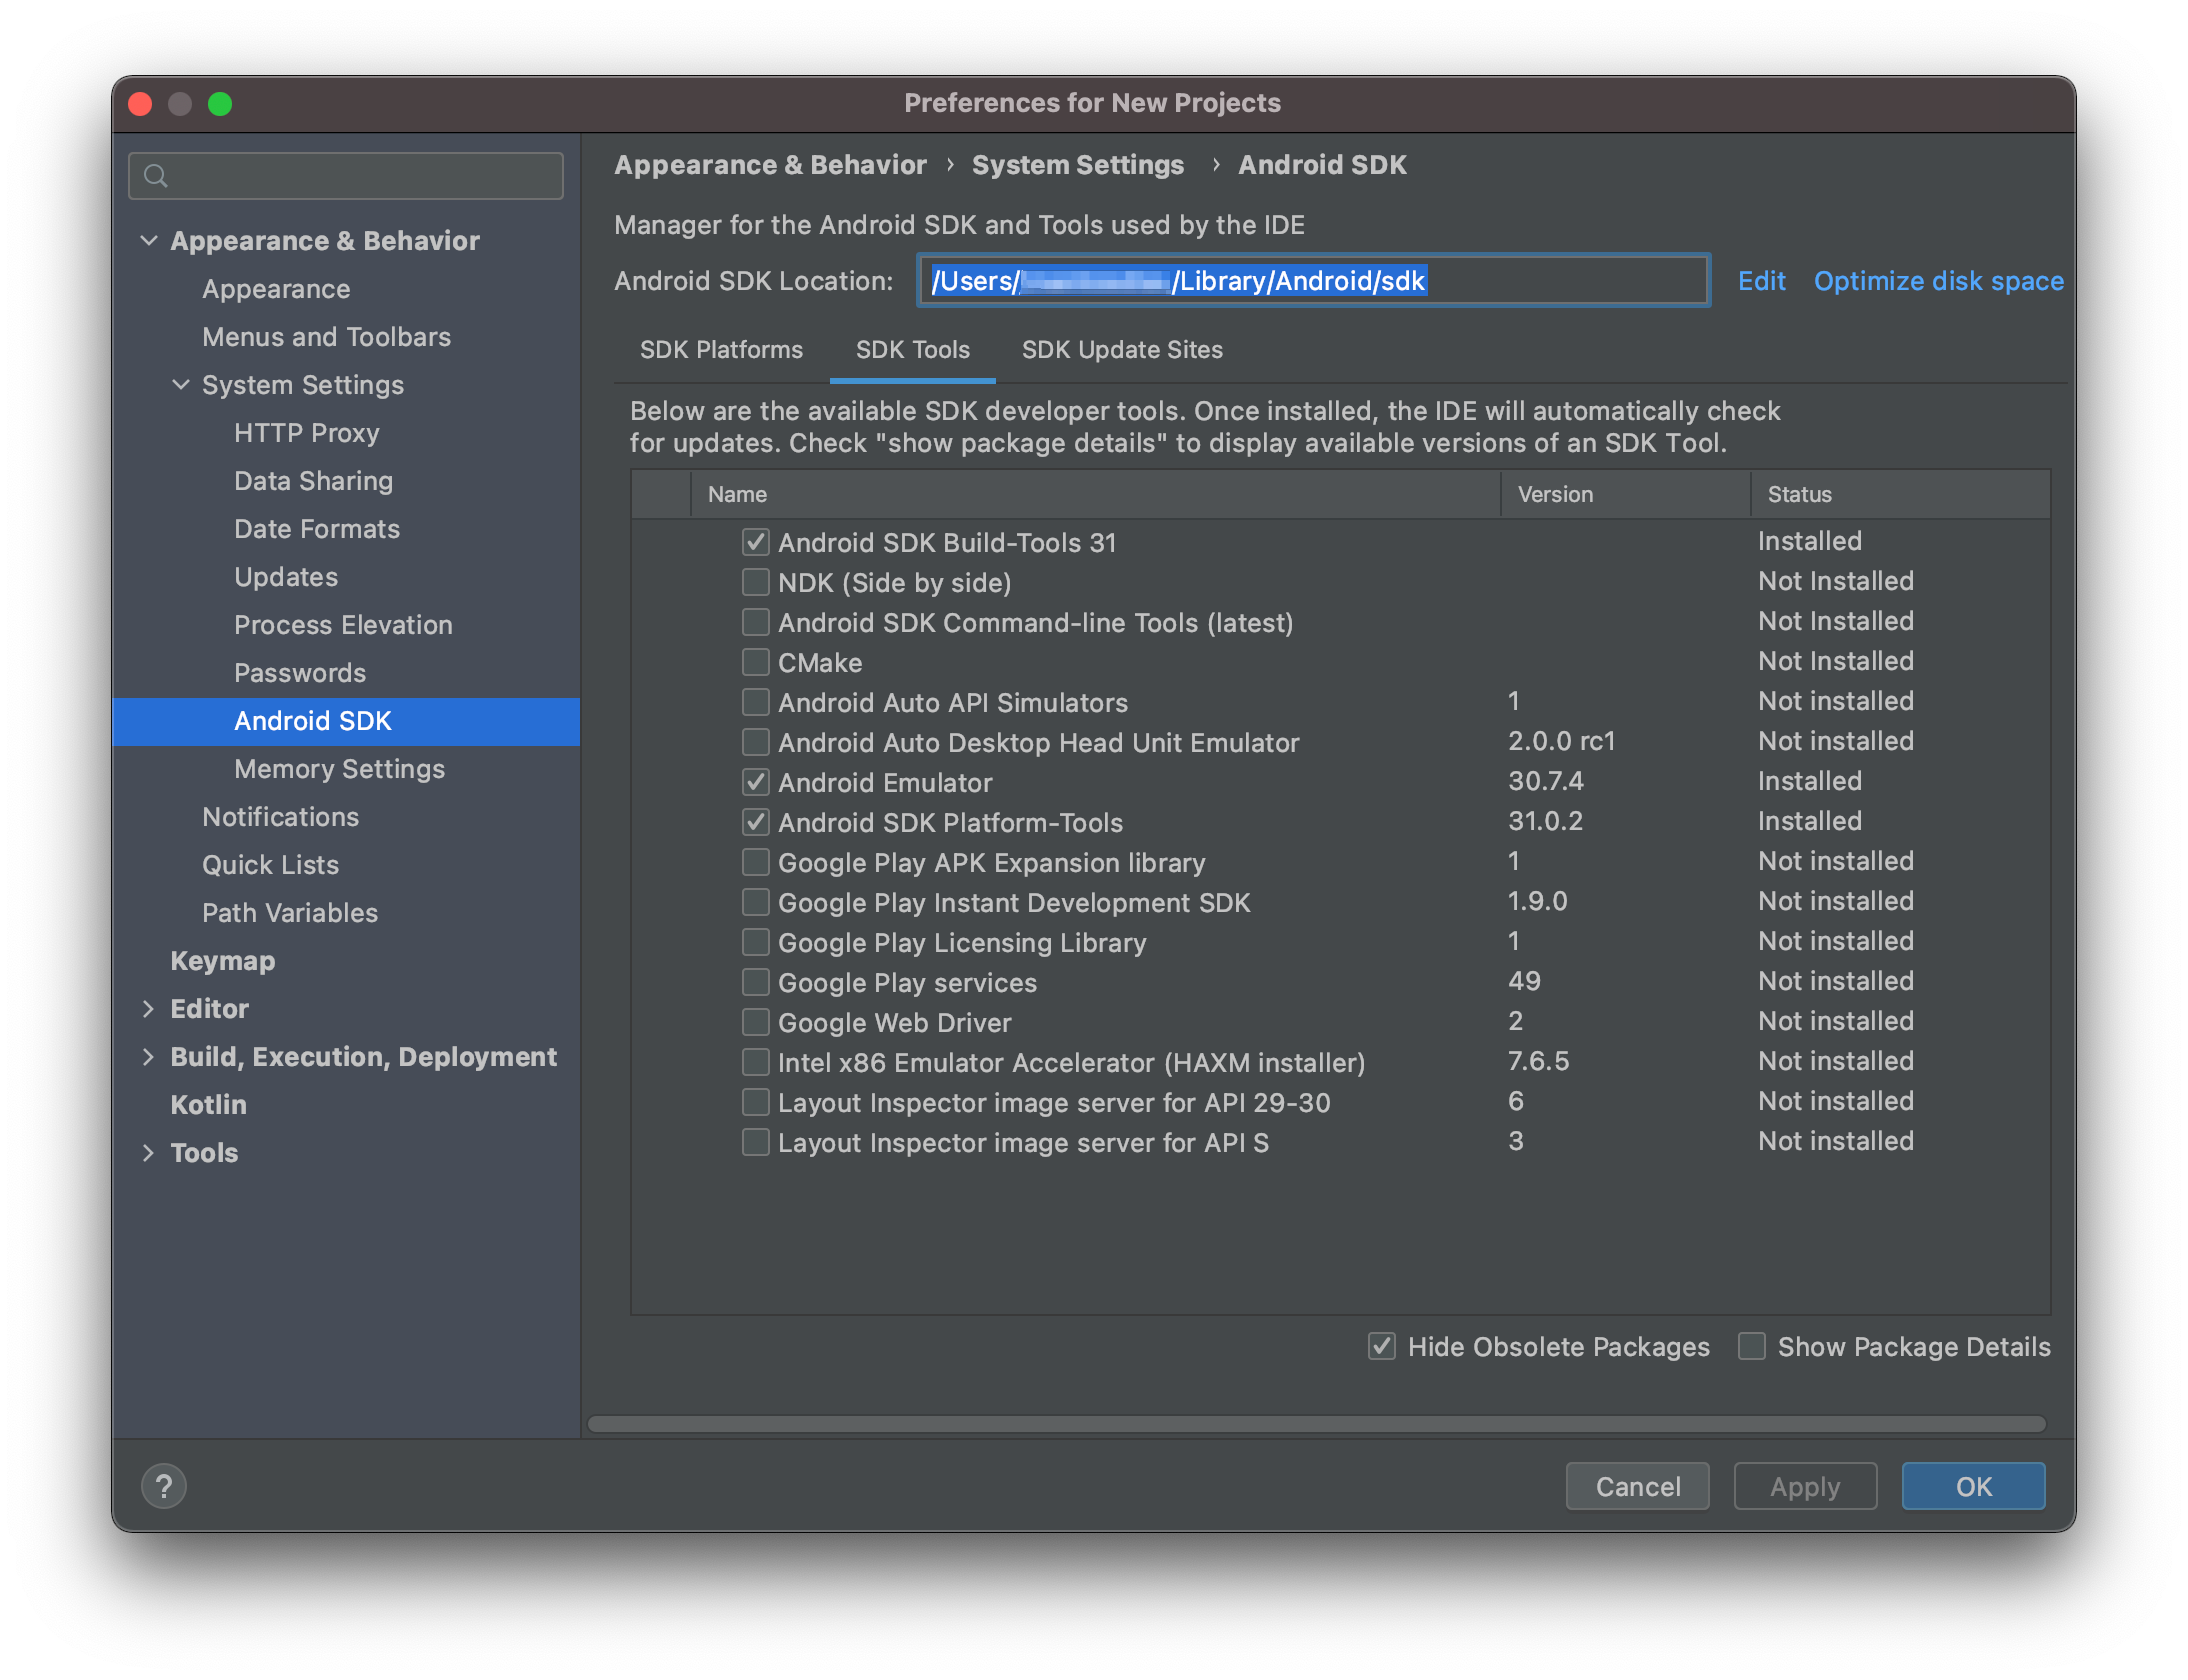
export PATH="${PATH}:$ANDROID_HOME/emulator:$ANDROID_HOME/tools:$ANDROID_HOME/tools/bin:$ANDROID_HOME/platform-tools"Note: You can verify your ANDROID_HOME location by opening Android Studio and then clicking on Configure > SDK Manager > System Settings > Android SDK and then taking a look at the Android SDK Location path.
Android Emulator
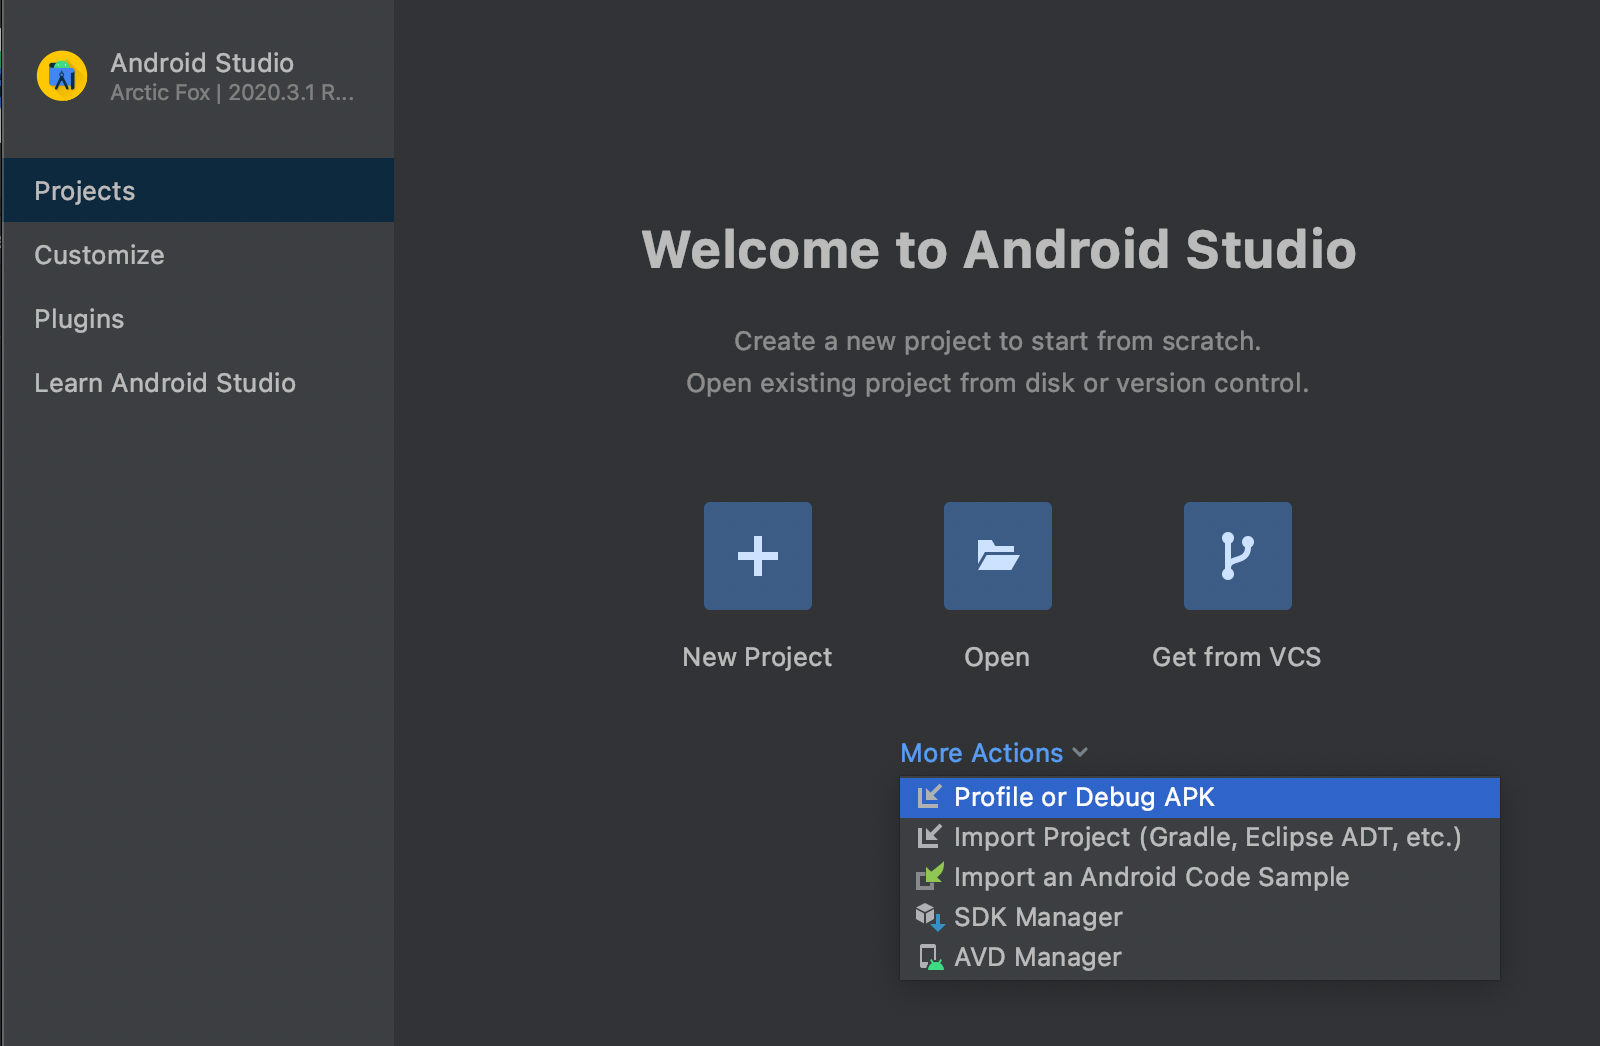
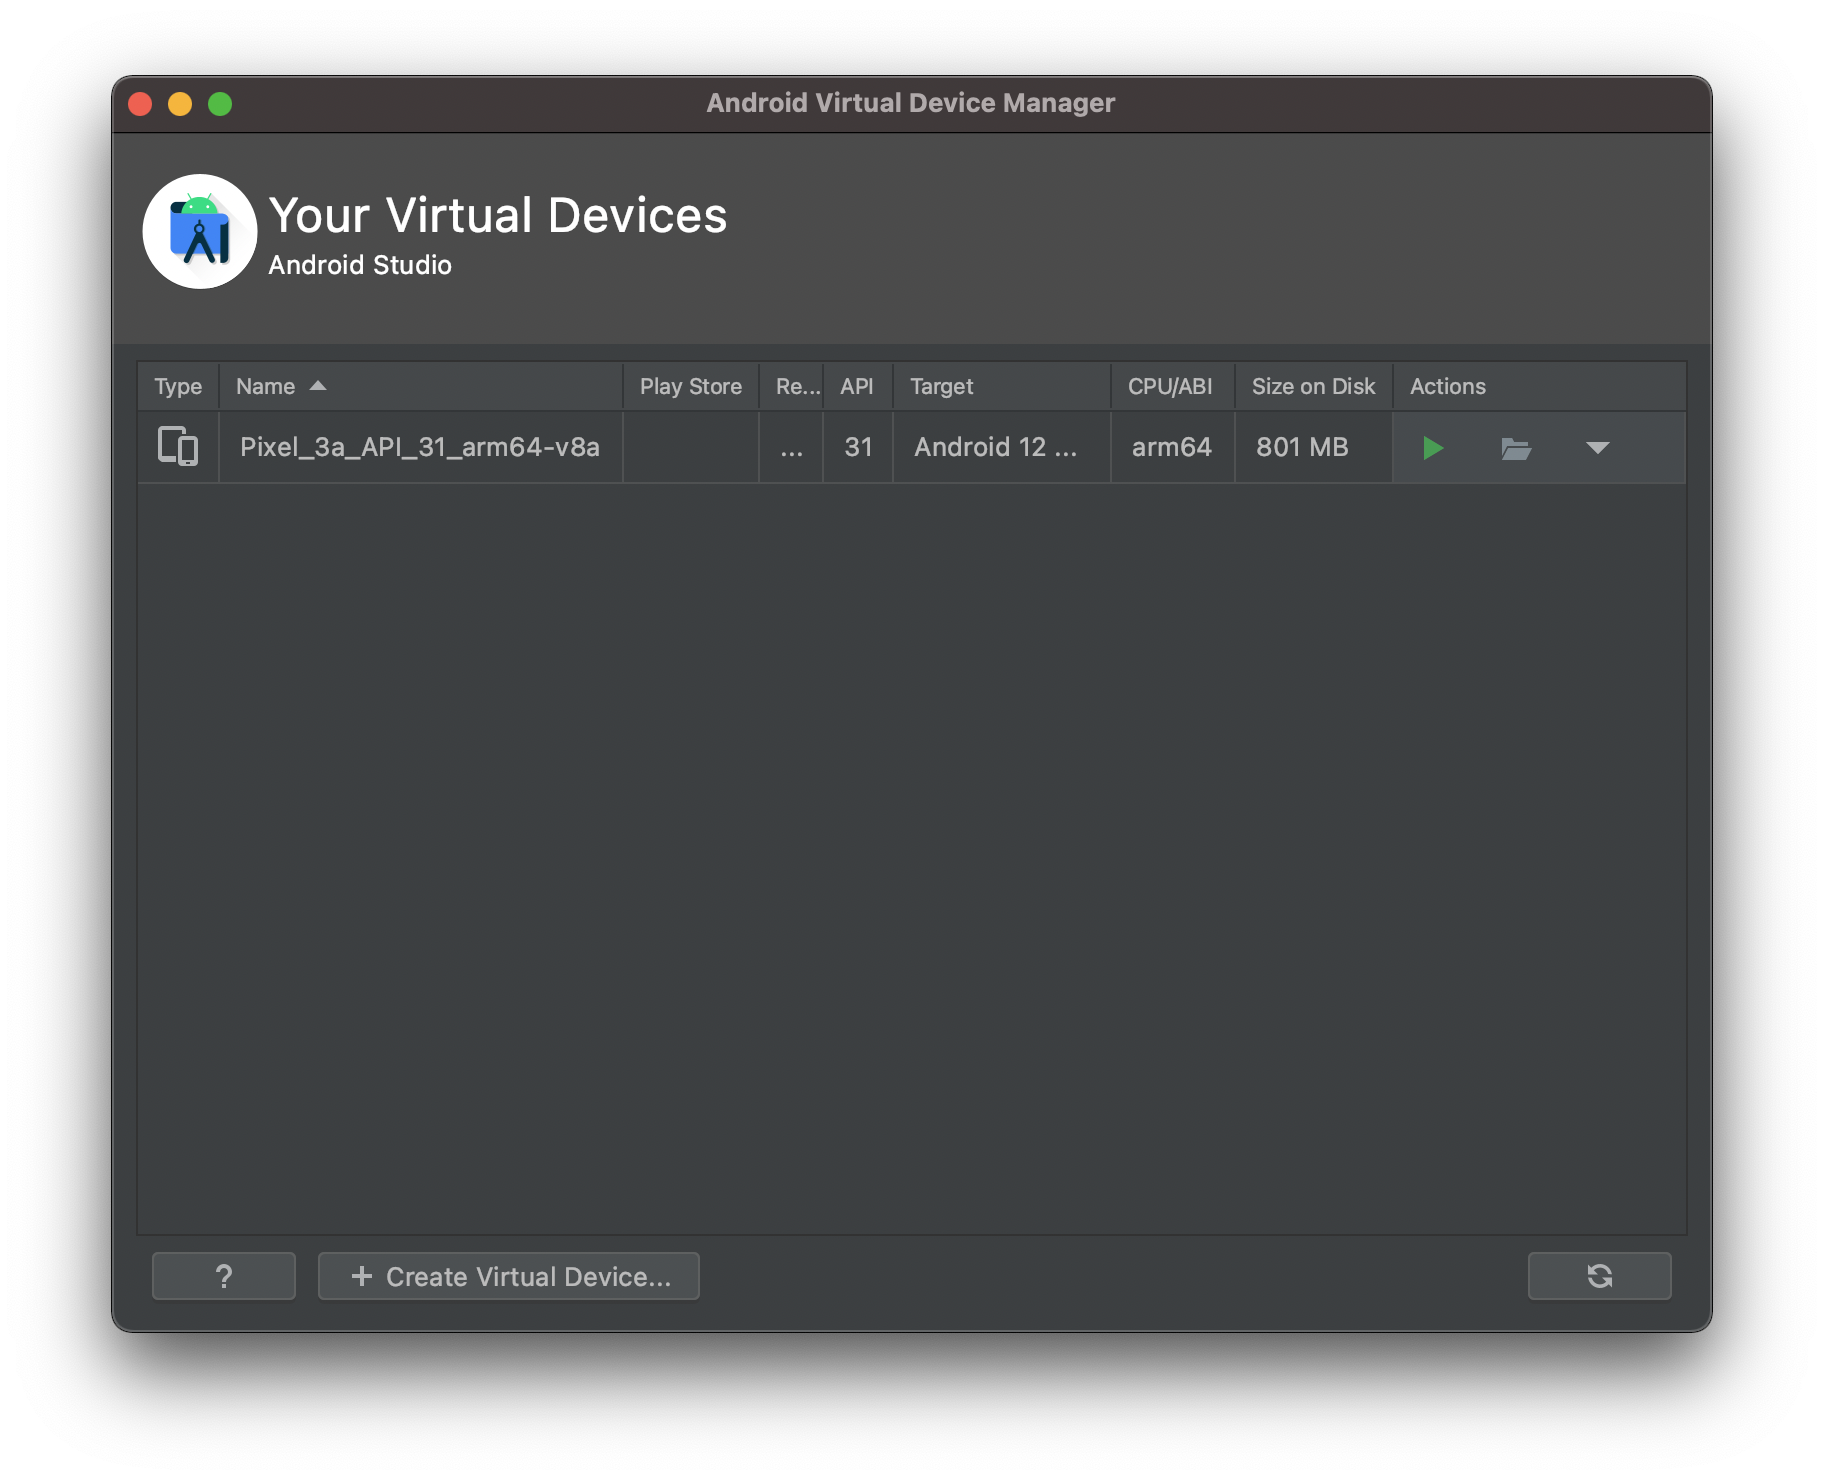
We can create an Android Emulator, also called an Android Virtual Device (AVD), in Android Studio by clicking on Configure > AVD Manager > Create Virtual Device.
Note: At the time of posting this, the release of Android Studio Arctic Fox I installed had a Pixel 3a AVD image that was Apple Silicon friendly.

iOS Setup
iOS Simulator
iOS setup is straightforward since we already have Xcode installed. We can download an iOS Simulator in Xcode by navigating to Xcode > Preferences > Components > Downloading a iOS Simulator version.
We can then open the simulator by navigating to Xcode > Open Developer Tool > Simulator.
Appium
Node.js is a prerequisite for running Appium Server, so we will install it first. Alternatively you can install Appium Desktop.
Node.js
Similar to before, we’ll add the nodejs plugin to asdf.
asdf plugin-add asdf
$ asdf plugin-add asdfNext, we can list all Node.js versions:
$ asdf list-all nodejsNode.js 16 has Apple Silicon support so we can install the latest version and make it globally accessible on our system. Note: At the time of writing this, 16.6.0 is the latest.
$ asdf install nodejs 16.6.0
$ asdf global nodejs 16.6.0
Appium Server
Now that we have Node.js installed, we can install Appium Server via npm:
$ npm install -g appiumAppium Desktop
You can download the latest release of Appium Desktop for Mac from the official releases section of the GitHub Repo.
The End
That’s it we’re done! 🎉 You now have everything setup to develop and run Appium tests for Android and iOS. Happy testing and enjoy your M1 Mac!
Separately, I’m currently working on a platform that enables developers to efficiently diagnose, resolve, and optimize their automation tests. We currently have an ongoing beta program for users to try it and if you want an invitation you can join the waitlist here. Just click on “Request an Invite.”
Member discussion